Support our educational content for free when you purchase through links on our site. Learn more
How Often Should You Clean Your Canon Camera? 🧼

Inspect your Canon camera after every shoot, but clean it only when dust, smudges, or moisture make it necessary. The right schedule depends on how and where you shoot: an indoor portrait camera needs less attention than a body that’s been through beach wind, trail dust, or drizzle.
So, how often should I clean and maintain my Canon camera for optimal performance? Give the exterior a quick check after each outing, clean the lens and body as needed, and check the sensor when your photos show persistent dust spots—not just because a calendar says it’s time.
We learned the value of that last distinction before a landscape trip: a small dark speck showed up in our test frames, so we checked the sensor at home instead of discovering it across a hundred blue-sky photos later. A quick check caught the issue early, while avoiding needless sensor cleaning kept a simple bit of dust from becoming a bigger problem.
Key Takeaways
- Inspect after every shoot; clean only when needed. Dusty, wet, and sandy conditions call for extra care.
- Check for sensor spots in photos before cleaning the sensor. Start with Canon’s in-camera sensor-cleaning function and follow your model’s manual.
- Blow away loose grit before wiping a lens or camera body. Use clean, camera-safe tools; skip household cleaners and canned air.
- Store gear dry, protect batteries, and back up photos before formatting cards.
- Seek professional service for liquid exposure, stuck controls, internal contamination, or persistent errors.
Table of Contents
- ⚡️ Quick Tips and Facts
- 🧼 How Often Should You Clean and Maintain a Canon Camera?
- A Simple Cleaning Schedule for Everyday, Travel, and Heavy Use
- What “Clean” Means: Routine Care vs. Professional Servicing
- 📷 Canon Camera Care: Background and Why Maintenance Matters
- How Dust, Moisture, Heat, and Wear Affect Camera Performance
- Weather-Sealed Canon Cameras and Lenses: What They Can—and Can’t—Handle
- 🧰 Canon Camera Cleaning Kit: What You Need and What to Avoid
- Safe Tools for the Camera Body, Lens, and Sensor
- Cleaning Products That Can Damage Camera Coatings
- 🧽 How to Clean a Canon Camera Body and Controls
- Clean the Grip, Buttons, Dials, Ports, and Hot Shoe
- Clean the LCD Screen, Viewfinder, and Eyecup
- Remove Dust from the Mount and Lens Contacts Safely
- 🔍 How to Clean Canon Camera Lenses Without Scratching Them
- Remove Dust Before Wiping the Front and Rear Elements
- Clean Lens Filters, Hoods, and Caps
- Prevent Fungus, Haze, and Persistent Smudges
- 🪞 Canon Sensor Cleaning: When to Do It and When to Stop
- Check for Dust Spots with a Sensor Test
- Use Canon’s Automatic Sensor Cleaning Function
- When Manual Sensor Cleaning or Professional Service Is Safer
- How to Reduce Dust During Lens Changes
- 🔋 Canon Camera Battery Care, Charging, and Storage
- Clean Battery Contacts and Check Battery Health
- Store Canon Batteries Safely Between Shots
- Protect Batteries from Heat, Cold, and Long-Term Storage
- 💾 Memory Card and File-System Maintenance
- Format Cards in the Camera and Back Up Photos Regularly
- Inspect Card Slots and Handle Cards Without Risk
- 🌧️ Cleaning and Drying a Canon Camera After Rain, Dust, or Saltwater
- What to Do When Your Camera Gets Wet
- Remove Sand, Mud, and Salt Residue Without Pushing It Inside
- Prevent Condensation When Moving Between Temperatures
- 🎒 Canon Camera Storage and Everyday Handling
- Choose a Dry, Clean Camera Bag and Storage Location
- Store Lenses, Caps, and Accessories to Limit Dust and Fungus
- Protect Your Camera During Travel and Outdoor Shots
- ⚙️ Firmware, Settings, and Performance Checks
- Check for Canon Firmware Updates Safely
- Test Autofocus, Image Stabilization, Shutter, and Buttons
- Keep Your Camera’s Clock, Settings, and Custom Functions in Order
- 🗓️ A Practical Canon Camera Maintenance Checklist
- After Every Shoot
- Weekly or Monthly Care
- Before a Trip, Event, or Important Shoot
- Annual Inspection and Professional Canon Service
- 🚨 Signs Your Canon Camera Needs Professional Repair
- ❌ Common Canon Camera Cleaning Mistakes to Avoid
- Conclusion
- Recommended Links
- FAQ
- Reference Links
⚡️ Quick Tips and Facts
For most Canon cameras, do a light external check after each shoot, clean the body and lens when visibly dirty, and inspect the sensor only when your photos show dust spots. There’s no magic calendar date when every Canon EOS R5, EOS R50, or EOS 90D needs a deep clean. Your environment and shooting habits matter more than the page on the calendar.
If you’re getting to know Canon systems, our Canon camera guide is a useful companion. We also collect practical advice in our Camera Guides section.
| Maintenance task | Sensible frequency | What to do |
|---|---|---|
| Quick exterior check | After each shoot | Look for dust, moisture, grit, and loose accessories |
| Body and grip cleaning | As needed; commonly weekly during regular use | Use a clean, soft cloth and a blower for loose debris |
| Front lens element cleaning | Only when dusty or smudged | Blow off grit first, then wipe gently with lens-safe materials |
| Sensor dust check | When spots appear, after dusty lens changes, or before important work | Photograph a plain, bright surface at a narrow aperture and inspect the image |
| Battery check | Before important shoots; contacts only as needed | Check charge and terminals; store batteries safely |
| Card and file check | After shoots and before formatting | Back up first, then format cards in the camera when appropriate |
| Full condition check | Before trips or major assignments | Test autofocus, controls, ports, card writing, and batteries |
| Professional service | If there’s a fault, impact, liquid exposure, or persistent contamination | Contact Canon or a qualified camera service center |
A quick warning: “Clean the camera” does not mean wiping every surface daily or swabbing the sensor on a schedule. Unecessary contact can create more risk than the dust you’re trying to remove. Canon’s support guidance and your camera’s manual should take priority for model-specific instructions; start with Canon Support.
🧼 How Often Should You Clean and Maintain a Canon Camera?
For routine care, inspect your Canon camera after every shoot and clean it when it needs cleaning. If you mostly photograph indoors, a gentle wipe every few weeks may be plenty. If you shoot on beaches, dusty trails, at sports events, or in rain, you may need to clean the outside after every outing and check the sensor more often.
There are two different jobs here:
- Cleaning removes dust, fingerprints, moisture, and grime from accessible surfaces.
- Maintenance also includes battery care, storage, firmware checks, card handling, and noticing mechanical or electronic problems early.
We’ve learned not to treat a sensor spot like a fire alarm. First, confirm that it’s actually dust on the sensor, not a mark in the scene, on the lens, or on a filter. Then choose the least risky cleaning method that solves it.
A Simple Cleaning Schedule for Everyday, Travel, and Heavy Use
Use this as a starting point, not a rigid rulebook. A camera used gently in a clean studio has different needs from one spending weekends in desert dust.
| Shooting routine | After each use | Weekly or monthly | Before important work |
|---|---|---|---|
| Occasional indoor photography | Check body and lens; store dry | Wipe visible fingerprints and check battery | Test battery, card, and autofocus |
| Regular everyday use | Remove loose dust; inspect for smudges | Clean grip, screen, viewfinder, and bag | Check sensor for visible spots if changing lenses often |
| Travel and outdoor photography | Wipe off moisture and grit; check seals and caps | Clean bag; inspect contacts and accessories | Test all controls, cards, batteries, and lens changes |
| Dusty, sandy, or humid work | Clean exterior carefully as soon as practical | Inspect mount and lens exterior; check for lingering moisture | Check image files for dust marks; seek service if debris is inside |
| Professional, high-volume use | Quick condition check after every assignment | Schedule checks around workload and environment | Test backup gear and all critical functions |
Our rule for paid or once-in-a-lifetime shoots: inspect before the assignment, not during the vows, the finish line, or the one brief patch of golden light. We once spotted a recurring dark speck on a sky while testing a camera before a landscape trip. A quick sensor check at home meant we could deal with it calmly instead of cloning it out of a hundred frames later.
What “Clean” Means: Routine Care vs. Professional Servicing
A home routine should stick to accessible exterior surfaces and basic checks. Opening the camera body, trying to remove internal debris, or forcing a stubborn control back into action isn’t routine maintenance.
| Level of care | Usually includes | Best for |
|---|---|---|
| Everyday cleaning | Blowing loose dust away; wiping body, screen, and lens exterior | Normal dirt and fingerprints |
| Sensor check | Taking a test photo and using in-camera sensor cleaning | Confirming whether dust affects images |
| Careful sensor cleaning | A compatible sensor swab and manufacturer-approved approach, if you’re experienced | Persistent, clearly identified sensor dust |
| Professional service | Internal cleaning, mechanical checks, repairs, liquid-damage assessment | Faults, contamination inside the body, damage, or uncertainty |
The Canon EOS R5 image-quality analysis by Michael Breitung is about image quality, not a camera-cleaning schedule. It does, however, offer a useful reminder that image results can change with operating conditions: the author reports increased hot-pixel noise during long exposures as the camera warmed. That’s not dirt and not a reason to clean the sensor. It’s a different performance issue, and one that shows why a test shot can tell you more than a guess.
📷 Canon Camera Care: Background and Why Maintenance Matters

Modern Canon EOS cameras—from the compact EOS R50 to the full-frame EOS R5—are built to be used, not wrapped in cotton wool. But a camera is also a precision tool with delicate optical surfaces, moving parts, electrical contacts, and openings that can admit dust or moisture.
Good upkeep protects more than appearances. It helps you avoid distracting sensor spots, unreliable electrical connections, sticky controls, and lens haze. For more camera brand advice, see Camera Brands and our broader Camera Features coverage.
How Dust, Moisture, Heat, and Wear Affect Camera Performance
Different problems leave different clues. A dark spot that stays in the same place in every frame points toward sensor dust; a hazy image may indicate a dirty lens, filter, or condensation. A camera that stops responding after a downpour needs assessment, not a more enthusiastic wipe.
| Exposure or issue | Common clue | First sensible response |
|---|---|---|
| Dust on the sensor | Dark specks in the same image locations, often more visible at narrow apertures | Make a sensor-test image; use in-camera cleaning first |
| Dust on a lens | Reduced contrast or visible debris, usually not sharp dark spots fixed in the same sensor position | Blow off loose dust; clean only if needed |
| Fingerprints or oils | Smears, flare, or reduced contrast | Use a clean lens cloth and suitable lens-cleaning method |
| Moisture or condensation | Foging, damp exterior, or unusual behavior | Power off if wet; dry safely and let condensation clear |
| Sand or grit | Crunchy rings, stuck controls, or debris near openings | Don’t rotate or press gritty controls; remove loose debris gently |
| Heat during long exposures | Increased image noise or hot pixels on some cameras | Consider exposure and Long Exposure Noise Reduction settings; don’t confuse it with dirt |
| Worn or damaged parts | Intermittent buttons, loose mount, errors, or card failures | Stop using affected functions and seek qualified service |
In the first YouTube video featured in this article, the photographer recommends routine external cleaning even when you’ve taken precautions such as switching the camera off during lens changes. That’s sound practical advice: prevention reduces dust, but it doesn’t make a camera immune. The video also says, “These microfiber cloths act like magnets to dust. And to ensure they do this for longer, keep yours in a clean waterproof bag.” The storage tip is especially useful; a cloth living loose in a dusty camera bag can become a portable dirt delivery system.
Weather-Sealed Canon Cameras and Lenses: What They Can—and Can’t—Handle
Weather resistance is not waterproofing. Canon’s wording and protection level vary by model and lens, and the assembled camera’s resistance can depend on the combination of body, lens, and accessories. Check the documentation for your exact gear on Canon Support.
| Situation | Practical advice |
|---|---|
| Light drizzle | Use a rain cover or shelter where possible; dry the outside afterward |
| Heavy rain or spray | Avoid exposure, even with weather-resistant gear |
| Saltwater spray | Keep gear covered; wipe exterior residue carefully after the shoot |
| Dusty wind | Change lenses in a sheltered spot and keep the mount facing down |
| Wet hands or damp controls | Dry hands before operating; don’t open doors while moisture is present |
A sealed body is a safety net, not an invitation to take your EOS R5 swimming. Avoid pressure washing, rinsing under a tap, or using compressed air to force debris toward seams.
🧰 Canon Camera Cleaning Kit: What You Need and What to Avoid
You don’t need a suitcase of gadgets. A few clean, purpose-made tools will handle most routine care. We prefer a small kit that stays clean over a dozen accessories rattling around beside loose grit.
Safe Tools for the Camera Body, Lens, and Sensor
| Tool | Suitable use | Notes |
|---|---|---|
| Manual air blower, such as a Giottos Rocket Air Blaster | Loose dust from exterior surfaces and some lens areas | Squeeze away from the camera first to clear the nozzle; don’t use canned air |
| Clean microfiber cloth | Body, screen, and lens exterior | Keep it in a clean bag; retire it if it picks up grit |
| Lens-cleaning tissue or a lens-safe cloth | Smudges on optical surfaces | Use only after removing loose particles |
| Soft lens brush | Loose dust on lens barrel or filters | Keep the brush covered and dedicated to camera gear |
| Camera-safe sensor swabs | Sensor cleaning, if you know the correct method | Match the swab to the sensor size and follow its instructions |
| Clean, dry storage case | Protects tools and camera | A clean cloth in a dirty bag is no longer clean |
For a manual blower, consider a reputable brand such as Giottos or VisibleDust. For lens care, use products specifically designed for coated camera optics rather than household cleaning supplies.
Video tip: The featured photographer recommends using a blower around contact points, zoom rings, and focus rings, and removing the eyecup for better access to viewfinder glass. Follow your camera manual and avoid directing debris into openings.
Cleaning Products That Can Damage Camera Coatings
Avoid these shortcuts:
- Canned compressed air: It can blast debris into the body or release propellant and liquid onto surfaces.
- Household glass cleaner: It may contain ingredients unsuitable for optical coatings or camera finishes.
- Paper towels, tissues, and clothing: They can carry grit or leave lint and scratches.
- Coton swabs near openings: Fibers can snag or remain behind.
- Excess cleaning fluid: Liquid can seep under buttons, screens, or lens elements.
- Vacuum cleaners: They can create static or pull debris in unwanted directions.
- Your shirt sleeve: Convenient? Absolutely. A camera-care strategy? Not so much.
If you’re unsure about a product or method, check the camera and lens manuals on Canon’s support site before proceeding.
🧽 How to Clean a Canon Camera Body and Controls
Turn the camera off, remove the battery if the area is wet or you’re cleaning near a battery compartment, and detach accessories only when needed. Work on a clean surface with good light. The goal is to lift dirt away—not shove it into seams.
Clean the Grip, Buttons, Dials, Ports, and Hot Shoe
- Remove loose dust first. Use a manual blower or a clean, soft brush. Don’t push debris into card slots, ports, or seams.
- Wipe the exterior gently. Use a clean, dry microfiber cloth on the body and grip.
- Use minimal moisture only when appropriate. If the manual allows it, lightly dampen the cloth—not the camera—and keep liquid away from openings.
- Clean around buttons without pressing grit inward. Use the corner of a clean cloth or a soft brush around the controls.
- Inspect the hot shoe and ports. If you see dirt, remove loose particles without scraping contacts or inserting anything into the connector.
- Let the camera dry fully. Don’t close it in a sealed bag while moisture remains.
A sticky dial or button may be a sign of residue or internal contamination. Don’t add lubricant or pry at the control. A qualified service center is the safer option.
Clean the LCD Screen, Viewfinder, and Eyecup
- Remove visible dust with a blower or gentle brush.
- Wipe the LCD with a clean lens-safe microfiber cloth.
- If the eyecup is removable, take it off as the manual describes and clean the accessible viewfinder glass gently.
- Don’t press hard on the screen or use liquid near the viewfinder.
- Refit the eyecup only after the area is dry and free of debris.
The featured video’s suggestion to remove the eyecup for better access is helpful when your model’s design permits it. But never force a part that doesn’t release easily—Canon bodies differ, and the manual is the authority.
Remove Dust from the Mount and Lens Contacts Safely
Before changing lenses, switch the camera off and point the mount downward where practical. If dust is visible on the exterior mount, use a blower while keeping the nozzle at a sensible distance.
Don’t touch the sensor, shutter curtain, or electrical contacts with fingers or cloth. Don’t spray liquid into the mount. If contacts look coroded, bent, or heavily contaminated, stop cleaning and seek service.
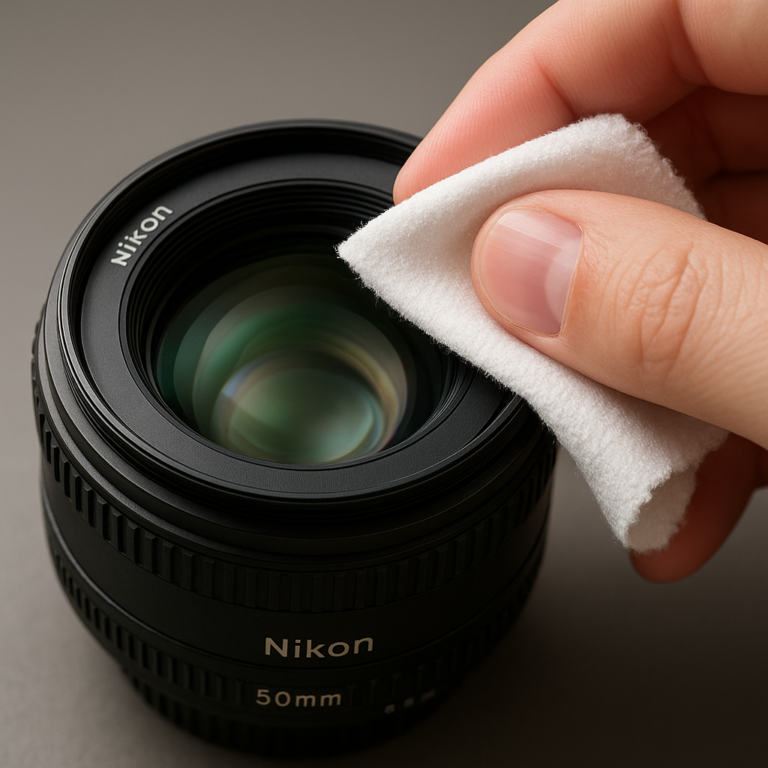
🔍 How to Clean Canon Camera Lenses Without Scratching Them
A lens can tolerate ordinary use; its optical coatings are not fond of grit being polished across them. Always remove loose particles before wiping. That one habit prevents many avoidable scratches.
Remove Dust Before Wiping the Front and Rear Elements
- Take the lens cap off and inspect the glass in good light.
- Use a manual blower to remove loose dust.
- If particles remain, use a clean lens brush with a light touch.
- For a fingerprint or smudge, use a clean lens cloth or lens tissue and a small amount of lens-safe cleaning fluid if needed.
- Wipe gently from the center outward, then inspect again.
- Fit the cap when the lens isn’t in use.
For rear elements, hold the lens securely and avoid touching the glass or contacts. Never wipe a dusty lens first; grit can turn a harmless smudge into a tiny scratch.
The featured video says a small amount of breath and a lens cloth can help with stubborn watermarks. We’d treat that as a field expedient, not the preferred routine: breath can leave moisture or residue. A dedicated lens-cleaning method is more predictable, especially on expensive coated glass.
Clean Lens Filters, Hoods, and Caps
- Remove a filter before cleaning the front element if you need to tell which surface is dirty.
- Clean filters like lens glass: blow off particles first, then wipe carefully.
- Rinse or wipe a hood only if its material and manufacturer instructions allow it; dry fully before attaching.
- Clean caps and rear caps with a dry cloth or soft brush.
- Check filter threads for grit before attaching or removing a filter.
A protective filter can take the first hit from dust and fingerprints, but a dirty filter can also reduce contrast or add flare. For gear choices and lens comparisons, browse Camera Comparisons.
Prevent Fungus, Haze, and Persistent Smudges
Lens fungus is associated with prolonged storage in damp conditions. Store lenses in a dry, clean place with airflow; use a desiccant product according to its instructions if your environment is humid, and check it periodically. Avoid leaving gear in a hot car or a damp bag.
Persistent haze inside a lens, fungus-like threads, or internal debris won’t be fixed by cleaning the outside. Don’t disassemble a lens at home. Internal optical alignment and coatings are delicate; have a qualified service provider inspect it.
🪞 Canon Sensor Cleaning: When to Do It and When to Stop
Don’t clean the sensor just because you’ve heard you should. Check your images first. A visible speck that stays in the same position across frames is a stronger reason to investigate than a vague worry about dust.
Check for Dust Spots with a Sensor Test
The featured video suggests photographing a clear blue sky at f/22 and zooming in to find dark spots. We use the same basic idea, with a few cautions:
- Choose a clean, bright, plain surface, such as a clear sky or evenly lit wall.
- Set a narrow aperture such as f/16 or f/22 and use a low ISO.
- Defocus the lens and photograph the surface evenly.
- Inspect the file on a large screen for dark marks.
- Repeat with a second frame if you’re uncertain.
A narrow aperture makes small dust particles more apparent, but the test isn’t a perfect diagnosis. Dust on a lens or filter can also affect images, though sensor dust tends to appear in consistent positions across photographs. Clean the front element and remove any filter before concluding the sensor is the culprit.
Use Canon’s Automatic Sensor Cleaning Function
Many Canon EOS cameras offer an automatic sensor-cleaning function. Its exact menu location and options vary by model, so consult the manual through Canon Support.
- Run the in-camera cleaning function first.
- Recheck with another test image.
- If your model permits it, follow the manual’s instructions for the camera’s cleaning mode.
- Keep the camera stable and avoid changing lenses in a dusty environment during the process.
The featured video describes this function as vibration that dislodges loose particles into a dust-trap area. That is a useful first step, but it may not remove sticky residue or every particle. If spots remain, don’t keep repeating the cycle indefinitely.
When Manual Sensor Cleaning or Professional Service Is Safer
Manual wet cleaning can work, but the sensor assembly is delicate and a wrong-size swab or poor technique can cause damage. If you’ve never cleaned a sensor, feel uncertain, or see stubborn marks, consider professional service.
If you decide to clean it yourself:
- Read the camera manual and sensor-swab instructions first.
- Use a swab made for your sensor size and a purpose-designed fluid.
- Work in a clean environment with a fully charged battery if the camera requires a cleaning mode.
- Use one new swab for each pass; never reuse a dirty swab.
- Stop if you feel resistance or see a mark that won’t move with a gentle pass.
The video recommends holding the camera facing downward when using a blower, then using a sensor-size-matched swab with a small amount of fluid for persistent dust. That’s a perspective worth knowing, but manual sensor cleaning carries risk. If a particle is stuck, oily, or near a delicate component, a professional is the sensible call.
How to Reduce Dust During Lens Changes
- Switch the camera off before changing lenses when practical.
- Choose a sheltered spot away from wind, sand, and spray.
- Keep the camera mount pointing down.
- Have the replacement lens ready before removing the first one.
- Avoid touching the rear element, mount contacts, or sensor area.
- Fit caps promptly and keep them clean.
These habits reduce dust; they don’t eliminate it. As the video’s photographer puts it, “Even taking all the advised precautions… doesn’t mean your camera shouldn’t get a routine clean.” The right response is an occasional image check, not panic after every lens change.
🔋 Canon Camera Battery Care, Charging, and Storage
Battery maintenance is easy to forget until your camera dies during the last five minutes of a sunset. Canon notes that “Battery packs naturally lose charge over time, even when not in use.” That’s why we check batteries before a shoot rather than trusting last month’s charge indicator.
For Canon’s specific battery guidance, read Canon’s battery-pack support article.
Clean Battery Contacts and Check Battery Health
- Check contacts for dust or residue when performance seems inconsistent.
- If needed, gently wipe the terminals with a clean, dry cloth, as Canon recommends.
- Don’t scrape contacts or use liquid cleaner.
- Check whether the battery holds charge and whether the camera reports reduced battery life.
- Replace a battery that repeatedly drains quickly despite being charged properly.
Use genuine Canon batteries or reputable, compatible products from established manufacturers. Verify compatibility for your camera; battery design and communication features vary across Canon models.
Store Canon Batteries Safely Between Shots
Canon advises against leaving a battery in the camera for long periods of non-use and recommends keeping its protective cover on during storage. Avoid storing a battery fully charged for extended periods, and recharge it shortly before planned use.
| Storage situation | Good practice |
|---|---|
| Between shoots | Store in a cool, dry place with the protective cover fitted |
| Long period without use | Follow Canon’s model-specific battery guidance; check charge periodically |
| Before a trip | Charge shortly before departure and carry a spare safely |
| Battery looks swollen, damaged, or unusually hot | Stop using it and follow safe disposal guidance |
Don’t put loose batteries in a pocket or bag beside keys, coins, or other metal objects. Protect terminals from short-circuiting.
Protect Batteries from Heat, Cold, and Long-Term Storage
Extreme temperatures can affect battery performance. In cold weather, keep spare batteries insulated and carry them close to your body; in heat, keep them out of direct sun and parked cars. If a cold battery appears to lose charge quickly, let it return to a moderate temperature before judging its condition.
Canon’s support article also discusses batteries that have sat unused and no longer appear to hold a full charge. Follow the guidance for your battery and camera rather than repeatedly forcing deep charge-discharge cycles as a general routine.
💾 Memory Card and File-System Maintenance
A card problem can look like a camera problem—until the camera reports an error during the one moment you can’t repeat. Make card care part of your post-shoot routine.
Format Cards in the Camera and Back Up Photos Regularly
- Copy files to at least one other storage location before formatting.
- Confirm that the backup opens and contains the expected images.
- Format the card in the camera that will use it, following the camera manual.
- Don’t remove a card while the access light is active or files are being written.
- Use cards that meet your camera’s recording requirements.
Formatting erases data. Never format a card before checking your backup. For an important job, consider a camera with dual card slots and use an appropriate backup workflow; our Camera Buying Guide covers features to consider.
Inspect Card Slots and Handle Cards Without Risk
Keep cards in a protective case, away from dust, moisture, magnets, and static-prone handling. Hold cards by their edges and don’t touch the contacts.
If the camera reports repeated card errors:
- Stop shooting if the files are at risk.
- Power off before removing the card.
- Back up any readable data promptly.
- Test with a known-good card that meets the camera’s specifications.
- If errors continue across multiple cards, contact Canon or a qualified service center.
Don’t blow into the card slot or push a tool inside to remove debris.
🌧️ Cleaning and Drying a Canon Camera After Rain, Dust, or Saltwater
Outdoor cameras collect stories—and sometimes salt, mud, or rainwater. The key is to remove exterior contamination without driving it into the body.
What to Do When Your Camera Gets Wet
- Power it off and disconnect accessories if safe to do so.
- Remove the battery and card only if the exterior and compartments are dry enough to open without letting water in.
- Wipe visible moisture from the outside with a clean, absorbent cloth.
- Keep doors closed if water may be present around them.
- Let the camera dry naturally in a cool, ventilated place.
- If it was submerged, soaked, or behaves abnormally, don’t power it back on; contact Canon service.
Avoid hair dryers, heaters, ovens, direct sun, and rice. Heat can damage components, and rice does not reliably remove moisture from inside a sealed camera.
Remove Sand, Mud, and Salt Residue Without Pushing It Inside
- Don’t turn a gritty zoom ring or press sandy buttons.
- Brush or blow loose dry particles away from the body before wiping.
- If salt residue is on the exterior, use a clean cloth lightly dampened with fresh water only where the manual permits; do not let liquid reach openings.
- Dry thoroughly before opening doors or fitting the camera into a closed bag.
- Seek service if sand or salt may have entered the mount, lens, or body.
Salt and sand are especially unkind to moving parts. A camera that feels crunchy or has a stuck control needs help, not a vigorous twist.
Prevent Condensation When Moving Between Temperatures
Moving gear from cold outdoors into a warm room can cause condensation. Place the camera in a closed bag before entering the warmer space and let it warm gradually. Open the bag once the equipment has reached room temperature and no condensation is visible.
If the lens fogs internally, allow it to clear naturally. Don’t remove the lens or battery door while moisture is present.
🎒 Canon Camera Storage and Everyday Handling
A good storage routine is simple: clean gear goes into a clean, dry place, and damp gear gets time to dry before it’s packed away. For broader gear advice, visit our Camera Guides.
Choose a Dry, Clean Camera Bag and Storage Location
- Use a camera bag with clean dividers and enough room to prevent gear from knocking together.
- Empty crumbs, dust, and sand from the bag periodically.
- Store the camera away from prolonged humidity, direct sun, and extreme heat.
- Use desiccants only as directed and replace or recharge them when necessary.
- Don’t leave your camera in a car for extended periods.
A bag is protection, but it can also become a dust trap. If the inside looks like the bottom of a hiking boot, clean it before returning your camera to it.
Store Lenses, Caps, and Accessories to Limit Dust and Fungus
Fit front and rear caps when lenses aren’t mounted. Keep body caps clean and store accessories in separate compartments. Avoid storing lenses while damp, and give equipment time to dry after wet-weather use.
If your home is humid, use a hygrometer to understand the environment and consider a controlled dry cabinet if you own valuable gear or multiple lenses. Don’t over-dry equipment without checking manufacturer guidance.
Protect Your Camera During Travel and Outdoor Shots
- Use a padded bag and secure loose accessories.
- Carry spare batteries in protective cases.
- Keep cards in a separate card wallet.
- Bring a blower and clean cloth for field maintenance.
- Use a rain cover in wet conditions; weather resistance alone isn’t enough.
- Avoid changing lenses in wind, beach spray, or blowing dust.
For a trip, pack the cleaning tools you’ll actually use—not every accessory you own. A clean cloth, blower, spare battery, and card case cover many everyday needs.
⚙️ Firmware, Settings, and Performance Checks
Not every performance issue is dirt. A firmware update may address compatibility or operational behavior; a hot pixel, card error, or slow autofocus may have another cause. Check systematically before assuming your camera needs a clean.
Check for Canon Firmware Updates Safely
Look up your exact model on Canon Support and read the update instructions and release notes. Before installing:
- Confirm the firmware is for the correct camera model.
- Charge the battery fully or use the power method Canon specifies.
- Back up files from the card.
- Don’t interrupt the update.
- Note any custom settings you may need to restore.
Don’t install firmware merely because a newer version exists if you have no reason to update; read the notes and decide whether the update applies to your use.
Test Autofocus, Image Stabilization, Shutter, and Buttons
Before a major shoot, take a few test frames and confirm that:
- Autofocus locks where expected.
- The shutter and burst mode behave normally.
- Image stabilization settings are appropriate for the lens and shooting method.
- Buttons, dials, touchscreen, and menus respond.
- The card writes and playback works.
- The viewfinder and LCD show an image without unexplained artifacts.
If a function behaves inconsistently, test with a known-good battery, card, lens, or setting where possible. Don’t clean internal components to treat an electronic or mechanical fault.
Keep Your Camera’s Clock, Settings, and Custom Functions in Order
Check the date and time before travel, events, and multi-camera shoots. Make a record of useful custom settings or save them if your camera supports it. Confirm image quality, file format, autofocus mode, and card destination before important work.
For long exposures, remember that heat-related noise is different from sensor dust. In his EOS R5 testing, Michael Breitung reported that long-exposure noise increased as the camera warmed; he found Long Exposure Noise Reduction useful for some longer exposures. That’s an individual field test, not a universal cleaning rule. If you photograph long exposures, test your own camera and settings, and consult the Canon EOS R5 image-quality article for that photographer’s full methodology.
🗓️ A Practical Canon Camera Maintenance Checklist
A routine works best when it’s short enough to follow. Keep this checklist in your camera bag or phone.
After Every Shoot
- Check for rain, dust, sand, and fingerprints.
- Remove loose dust with a blower before wiping.
- Dry the exterior before storage.
- Fit lens and body caps.
- Check remaining battery charge and card capacity.
- Back up important files.
Weekly or Monthly Care
- Wipe the body, grip, LCD, and viewfinder if needed.
- Clean your camera bag and inspect dividers.
- Check battery condition and protective cases.
- Review images for sensor spots if you’ve changed lenses often.
- Clean the lens only when it has visible dust, smudges, or residue.
Before a Trip, Event, or Important Shoot
- Test every battery, card, lens, and critical control.
- Confirm autofocus and stabilization.
- Check the clock, image settings, and firmware status.
- Inspect the front and rear lens elements.
- Take a sensor-test image if spots would be costly or distracting.
- Pack a blower, clean cloth, spare battery, and card case.
Annual Inspection and Professional Canon Service
There’s no universal rule that every Canon camera needs a professional service every year. Base service on use, condition, and symptoms. A heavily used camera working in dust, rain, or salt spray may warrant more frequent inspection than a lightly used indoor body.
| Situation | Recommended response |
|---|---|
| Camera works normally and is lightly used | Routine home checks may be sufficient |
| Heavy professional use | Consider periodic inspection based on workload and manufacturer advice |
| Impact, liquid exposure, or persistent fault | Arrange assessment promptly |
| Repeated dust or contamination inside optical components | Seek qualified service |
| Unusual noise, error messages, or unreliable operation | Stop relying on it for critical work until checked |
🚨 Signs Your Canon Camera Needs Professional Repair
Get professional help if you notice:
- The camera was submerged or significantly soaked.
- A control is stuck, gritty, or unresponsive.
- The lens mount feels loose or appears damaged.
- A persistent sensor mark remains after safe cleaning attempts.
- There’s fungus or haze inside a lens.
- The camera shows repeated error messages or card failures with known-good media.
- Battery or camera compartments show corrosion.
- The camera makes unusual mechanical noises or the shutter behaves erratically.
- The body, lens, or screen has suffered an impact.
For support options, start with Canon’s service and repair resources. If your camera is needed for paid work, arrange a backup body or lens while it’s being assessed.
❌ Common Canon Camera Cleaning Mistakes to Avoid
- Wiping before blowing: loose grit can scratch optical surfaces.
- Cleaning the sensor by calendar: unnecessary sensor contact adds risk.
- Using canned air: forceful airflow can push debris inside or leave residue.
- Using household cleaners: optical coatings and camera finishes need appropriate care.
- Putting a damp camera straight into a sealed bag: trapped moisture encourages trouble.
- Opening compartments while wet: this may let moisture enter the body.
- Touching contacts or the sensor: oils and static can create new problems.
- Over-cleaning lens glass: frequent wiping can wear coatings and increase scratch risk.
- Assuming weather sealing means waterproof: protection varies by model and lens combination.
- Treating image noise as dust: hot pixels and high-ISO noise are not sensor dirt.
- Formatting a card before backup: no cleaning kit can recover a photo you erased.
- Forcing a stuck control: grit, impact, or internal damage needs diagnosis, not muscle.
The short version? Inspect regularly, clean gently, clean only what needs it, and stop when the job moves beyond safe exterior care.