Support our educational content for free when you purchase through links on our site. Learn more
How to Transfer Canon Photos to Your Computer 📸

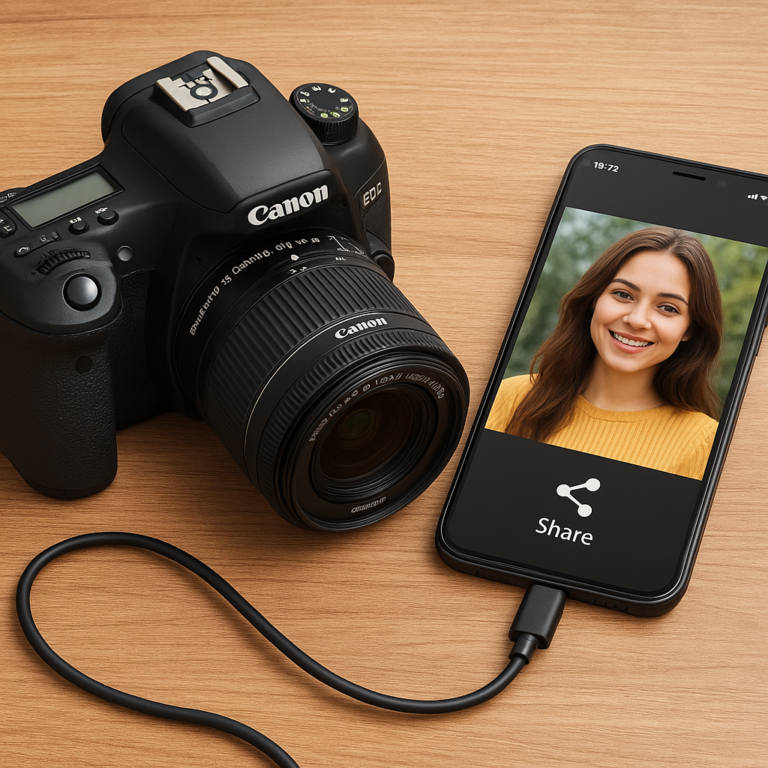
To answer “How do I transfer photos from my Canon camera to my computer?”: connect the camera with a data-capable USB cable, or remove its memory card and use a compatible reader, then copy or import the files to your computer. For large batches, we usually reach for a card reader; for a few quick shots, USB is simple, and compatible Canon cameras can also transfer wirelessly.
We’ve learned to check the cable before blaming the camera. One photo session, a perfectly good Canon body, and a charging-only cable later, were staring at a computer that insisted nothing was connected. Switching cables fixed it in seconds.
Whichever method you choose, copy the original files, verify they open, and back them up before deleting anything from the card. The same basic routine works for JPEGs, Canon RAW files such as CR2 or CR3, and videos—though big clips may take longer.
Key Takeaways
- Fastest dependable option for many photos: Use a compatible memory card reader.
- Easiest direct connection: Connect your Canon camera with a data-capable USB cable.
- Cable-free option: Use Wi-Fi and compatible Canon software, such as EOS Utility or Image Transfer Utility 2, when your camera supports it.
- Keep your originals safe: Copy files, check that they open, and make a backup before formatting or clearing the card.
- Can’t see the photos? Check the DCIM folder, try another cable or reader, and confirm your software supports the file type.
Table of Contents
- ⚡ Quick Tips and Facts: Canon Photo Transfer at a Glance
- 📷 How Canon Camera Photo Transfer Works
- 🔌 Choose the Best Way to Transfer Photos from Your Canon Camera
- 1. Transfer Photos with a USB Cable
- 2. Import Photos with a Memory Card Reader
- 3. Transfer Photos Wirelessly with Wi-Fi or Bluetooth
- 4. Use Canon EOS Utility or Camera Connect
- 💻 Import Canon Photos to a Windows PC
- Using Windows Photos or File Explorer
- 🍎 Import Canon Photos to a Mac
- Using Photos, Image Capture, or Finder
- 📥 Transfer All Canon Photos in One Batch
- Choose a Destination Folder and Keep Files Organized
- 🎯 Transfer Selected Photos Instead of Everything
- Find and Copy Specific Images by Date or File Type
- 📁 Find Canon Photos and Videos on Your Camera or Computer
- Where Canon Saves JPEG, RAW, and Video Files
- 🖼️ Transfer RAW, JPEG, and CR3 Files Without Losing Quality
- 📡 Transfer Photos from Canon to a Computer Without a Cable
- Wi-Fi Setup, Bluetooth Pairing, and Wireless Transfer Limits
- 🧰 Canon Transfer Software, Drivers, and Compatibility
- EOS Utility, Camera Connect, and Operating-System Tools
- Older Canon EOS Rebel and PowerShot Cameras
- 🛠️ Fix Canon Camera Connection and Import Problems
- Computer Does Not Recognize the Camera
- Photos Will Not Import or the Transfer Stops
- Unsupported Files, Missing Images, and Permission Issues
- 🔒 Protect Your Photos After Transferring
- Verify Copies Before Deleting Images from the Memory Card
- Back Up Canon Photos to an External Drive or Cloud Storage
- ✅ Canon Photo Transfer Checklist
- Conclusion
- Recommended Links
- FAQ
- Can I transfer photos from my Canon camera to my computer with a USB cable?
- How do I transfer photos from a Canon camera to a laptop wirelessly?
- Why is my Canon camera not showing up on my computer?
- Can I transfer photos without installing Canon software?
- How do I transfer photos from an old Canon EOS Rebel 350D?
- Will transferring photos reduce their quality?
- Reference Links
⚡ Quick Tips and Facts: Canon Photo Transfer at a Glance
For more Canon camera tips, see our Canon camera guide. At Camera Brands™, we’ve moved photos from everything from modern EOS R bodies to older Rebels—and the best method usually comes down to one question: do you want the simplest transfer, the fastest transfer, or the fewest cables?
| Method | Best for | What you need | Main advantage | Watch out for |
|---|---|---|---|---|
| USB cable | A direct connection and occasional imports | Compatible USB cable | Straightforward; no card removal | Some cables charge only and cannot transfer data |
| SD card reader | Fast, reliable batch imports | Card reader compatible with your memory card | Often faster than connecting the camera | Eject the card safely; avoid changing files on it |
| Wi-Fi | Cable-free transfers and compatible cameras | Wi-Fi-compatible Canon camera and software | Convenient after setup | Can be slower; menus differ by model |
| EOS Utility | Canon camera control and computer imports | Compatible camera, cable or supported wireless setup, Canon software | Supports batch and selected-image downloads | Setup and compatibility vary by camera and operating system |
The quick answer
- Turn off the camera before connecting a cable or removing the card.
- Connect the camera using a data-capable USB cable, or insert its memory card into a reader.
- On Windows, import with Photos or browse the card in File Explorer. On Mac, use Photos, Image Capture, or Finder.
- Copy files to a folder on your computer, then open a few images to confirm the transfer worked.
- Keep the originals on the card until you have verified the copies—and preferably backed them up.
Canon’s EOS Utility instructions describe both batch downloads and selecting individual images. For a broader overview of camera connection choices, browse our camera guides.
Photographer’s tip: We prefer a card reader for large shoots and USB for a quick handful of files. Wi-Fi is lovely when the camera is already paired; it’s less lovely when you’re standing in a dim venue trying to remember which menu hides the network password. 📸
📷 How Canon Camera Photo Transfer Works
Your Canon camera stores photographs and videos on a memory card, typically in folders such as DCIM. Transferring a photo means copying the original file from that card to your computer or importing it into a photo library. It does not automatically edit, resize, or improve the image.
The files you see may include:
- JPEG: A camera-processed image that’s widely compatible and ready to share.
- RAW: A larger file containing more image data for editing. Canon RAW extensions vary by model and generation, including CR2 and CR3.
- Video: Often much larger than still images, so long clips may take considerably longer to copy.
- Sidecar or auxiliary files: Some workflows create additional files for settings or edits.
A transfer may use a cable, card reader, wireless connection, or Canon software. The method changes; the basic rule does not: copy first, verify second, erase last. We learned that lesson after a rushed card format turned a very good wedding reception into a very bad memory-card recovery exercise.
Canon’s EOS Utility guide explains that transferred files can be saved in the computer’s Pictures folder and organized by shooting date, though destination settings can be changed. Your camera model and software version may present different options.
🔌 Choose the Best Way to Transfer Photos from Your Canon Camera
There isn’t one perfect transfer method for every Canon camera, computer, and photo collection. Here’s how the main options compare.
| Method | Speed for many files | Setup difficulty | Works without Wi-Fi? | Our take |
|---|---|---|---|---|
| USB cable | Good | Easy to moderate | ✅ | A dependable choice if the cable supports data |
| Memory card reader | Usually very good | Easy | ✅ | Our usual pick for large imports |
| Camera Wi-Fi | Varies; often slower for large batches | Moderate | ❌ | Handy for compatible cameras and cable-free convenience |
| EOS Utility | Good, depending on connection | Moderate | USB: ✅; Wi-Fi: model-dependent | Useful for Canon-specific importing and camera workflows |
If you’re deciding which camera accessories belong in your kit, our camera buying guide and camera comparisons can help you compare compatible equipment.
1. Transfer Photos with a USB Cable
A direct USB connection is often the easiest place to start. Use the cable type required by your Canon model: newer cameras may use USB-C, while older ones may use a different connector. The connector fitting the camera is not enough; the cable must also carry data.
- Turn the camera off.
- Connect the cable to the camera and a USB port on the computer.
- Turn the camera on. If it asks for a connection mode, select the option for computer connection or image transfer.
- Open the import application or file browser on your computer.
- Select the images to import or copy.
- Choose a destination folder and wait until the transfer finishes.
- Open several transferred files to check that they’re readable.
If the camera doesn’t appear, try another USB port and a known data-capable cable. A charging-only cable can power a device while refusing to pass files, like a waiter who brings the coffee but keeps the menu.
Canon’s EOS Utility manual provides Canon’s software-based import steps. For model-specific setup, check your camera’s support page on the Canon website.
2. Import Photos with a Memory Card Reader
A card reader lets your computer read the memory card directly. This is a strong option for large batches, long videos, and situations where connecting the camera is inconvenient.
- Turn off the camera.
- Remove the memory card carefully.
- Insert it into a reader that supports the card type—such as SD, SDHC, or SDXC—and connect the reader to your computer.
- Open File Explorer on Windows or Finder on Mac.
- Open the card and look for the DCIM folder.
- Copy the image and video folders to a destination on your computer.
- Open a few files before ejecting the card.
- Eject the card safely, then return it to the camera.
The first video in this article demonstrates both direct USB transfer and card-reader copying. Its presenter prefers removing the SD card, inserting it into the computer, and choosing a destination such as the Desktop. That’s a sensible shortcut—though for a shoot with hundreds of files, we recommend copying into a clearly named project folder rather than letting the Desktop become a digital junk drawer.
✅ Advantages: No camera battery drain during the copy; convenient for bulk transfers; easy to browse files directly.
❌ Drawbacks: You need a compatible reader, and removing the card adds a small risk of misplacing or mishandling it.
3. Transfer Photos Wirelessly with Wi-Fi or Bluetooth
Some Canon cameras can send images wirelessly to a computer using Wi-Fi and compatible Canon software. Wireless features and menu names vary by camera, so consult the manual for your model before following a specific setup path.
A useful distinction:
- Wi-Fi can handle image transfers and, on supported models, connections to computers or other devices.
- Bluetooth is commonly used for pairing or maintaining a low-energy connection; it does not necessarily mean the camera can send full-resolution photo batches over Bluetooth alone.
Canon’s Image Transfer Utility 2 support instructions describe wireless automatic transfer for compatible cameras. The setup involves installing the utility, pairing the camera and computer, and configuring the camera’s wireless transfer settings. Those instructions apply only to supported models and configurations; don’t assume every Canon camera has the same menus or features.
Wireless transfer is handy for a small set of images, remote workflows, or automatic transfer after a shoot. For a memory card full of RAW files or lengthy video clips, a cable or card reader is usually a better fit.
4. Use Canon EOS Utility or Camera Connect
EOS Utility is Canon software for supported cameras and computers. Its import workflow includes options to download images in a batch or select particular images. Canon also documents destination-folder settings and the option to open transferred images in Digital Photo Professional when installed.
A simple EOS Utility workflow:
- Install the version that supports your camera and computer from Canon’s software and drivers page.
- Connect the camera using a supported USB or wireless connection.
- Open EOS Utility and choose Download images to computer for a batch, or Select and download for individual images.
- Review the transfer settings and destination folder.
- Start the transfer and wait for it to finish.
- Open the destination folder and verify the files.
Canon’s EOS Utility instructions say that movies can take longer to transfer because of their larger file sizes. That’s especially noticeable with high-resolution video: let the copy finish instead of unpluging the camera because a progress bar appears to have taken up permanent residence.
Canon Camera Connect is a separate mobile app, principally useful for compatible cameras and mobile devices. It is not automatically the right tool for importing directly to a computer. Check Canon’s Camera Connect information and your camera manual for supported devices and workflows.
💻 Import Canon Photos to a Windows PC
Windows gives you two practical routes: import through Photos or copy files directly in File Explorer. The second route makes it easier to see the card’s folder structure and choose exactly what to copy.
Using Windows Photos or File Explorer
Import with Windows Photos
- Connect the camera or card reader.
- Unlock or turn on the camera if connected directly.
- Open the Photos app.
- Choose the connected device or import option.
- Select the pictures and videos you want.
- Confirm the import destination, then begin importing.
- Check the library or destination folder for the transferred files.
Windows interfaces can change with system updates, and the exact button names may differ. If Photos doesn’t list the camera, use File Explorer or Canon software instead.
Copy files with File Explorer
- Connect the camera or insert its memory card.
- Open File Explorer and select This PC.
- Look for the camera, card, or removable drive.
- Open it and browse to DCIM.
- Select the required folders or files.
- Copy them and paste them into a clearly named folder, such as
Pictures/2026-11-05-Trip. - Open several files to verify the copy.
Copy, don’t move. A copy leaves the original on the card, giving you a safety net if the transfer was incomplete.
🍎 Import Canon Photos to a Mac
On a Mac, Photos is convenient for building a library, Image Capture is useful for importing into a chosen folder, and Finder can browse a card like a regular drive.
Using Photos, Image Capture, or Finder
Import into Photos
- Connect your camera or card reader.
- Open Photos.
- Select the camera or card under the import area.
- Choose the images to import or select all.
- Choose an album or import destination if prompted.
- Start the import and confirm the images appear in your library.
Import with Image Capture
- Connect the camera or card.
- Open Image Capture.
- Select the device in the sidebar.
- Choose a destination folder from the import menu.
- Select images or use the option to import all.
- Start the import and verify the saved files.
Copy with Finder
- Insert the card into a reader and connect it to your Mac.
- Open Finder and select the card in the sidebar.
- Open DCIM and locate the image folders.
- Copy the files to a folder on your Mac.
- Eject the card in Finder before removing it.
If a camera is not visible in Photos or Image Capture, try the card-reader route, a different cable, or Canon’s supported software. For additional camera setup advice, browse our camera features articles.
📥 Transfer All Canon Photos in One Batch
A full-card import is best when you want a complete archive or are moving the entire shoot to your computer.
Choose a Destination Folder and Keep Files Organized
Before starting, create a folder structure you can understand later. For example:
Pictures
└── Canon
 └── 2026
 └── 2026-11-05_Trip
``

Then:

1. Connect the camera or card reader.
2. In your import app, choose **Import all** or select all files.
3. Pick the destination folder.
4. Start the transfer and leave the connection undisturbed.
5. Wait for the completion message, especially when copying video.
6. Confirm the number of files looks reasonable and open sample photos.

In EOS Utility, Canon describes batch downloading through **Download images to computer**, followed by transfer preferences and **Start automatic download**. The default destination is described as the computer’s Pictures folder, organized by shooting date; settings can be changed in the application. See Canon’s [EOS Utility import instructions](https://cam.start.canon/en/S003/manual/html/UG-01_Import_0010.html).

**Keep original filenames unless you have a reason to change them.** Renaming every file during import can make it harder to match photos with a camera, edit, or backup later.

## [🎯 Transfer Selected Photos Instead of Everything](#transfer-selected-photos-instead-of-everything)

Only need a few images? Selective import saves space and time—but be cautious not to overlook RAW files, alternate exposures, or short video clips you meant to keep.

### [Find and Copy Specific Images by Date or File Type](#find-and-copy-specific-images-by-date-or-file-type)

1. Open the card or camera in your import application.
2. Sort or browse by **date**, filename, or file type.
3. Select the required JPEG, RAW, or video files.
4. Copy or import them to your destination folder.
5. Open a few files and confirm they’re the intended images.

Canon EOS Utility supports choosing images through **Select and download**, checking the images in the viewer, setting a destination, and starting the transfer. Canon notes that transferred images can appear in its Quick Preview window. See the [EOS Utility guide](https://cam.start.canon/en/S003/manual/html/UG-01_Import_0010.html).

**Don’t select JPEGs alone by accident** if you shot RAW+JPEG and want the RAW originals for editing. A filename ending in `.JPG` is not the same file as its `.CR3` or `.CR2` companion, even when both show the same frame.

## [📁 Find Canon Photos and Videos on Your Camera or Computer](#find-canon-photos-and-videos-on-your-camera-or-computer)

When the camera says it has pictures but the computer seems to show an empty card, look inside the card’s folders rather than stopping at the first screen.

### [Where Canon Saves JPEG, RAW, and Video Files](#where-canon-saves-jpeg-raw-and-video-files)

Many camera cards use a **DCIM** folder for image files. The precise folder and file organization can vary by camera, format, and recording setup. The [first video in this article](#featured-video) also notes that folder structures can differ between camera models.

| What you’re looking for | Common clue | Where to check |
|---|---|---|
| JPEG photos | `.JPG` or `.JPEG` | Camera’s image folders, often inside DCIM |
| Canon RAW photos | `.CR2` or `.CR3`, depending on model | The same image folders, if RAW was recorded |
| Videos | File extensions and folders vary by camera/settings | Browse all folders; don’t assume every clip is beside the JPEGs |
| Missing or older images | A different folder or date range | Check every subfolder and sort by date |

Avoid renaming, deleting, or moving files on the card while troubleshooting. First make a copy of the whole relevant folder to your computer.

## [🖼️ Transfer RAW, JPEG, and CR3 Files Without Losing Quality](#transfer-raw-jpeg-and-cr3-files-without-losing-quality)

**Copying an original file does not reduce image quality.** Quality changes can happen later if an application exports, compresses, resizes, or edits the image—not simply because you transferred it.

- **JPEG:** Easy to open, share, and preview; processing has already been applied in-camera.
- **RAW:** Better suited to extensive editing, but requires compatible software for full processing.
- **CR3 and CR2:** Canon RAW formats used by different camera generations. Software support depends on the application and its version.
- **Video:** Larger files can need more storage and longer transfer times.

If your computer can’t preview a RAW file, **that doesn’t automatically mean the transfer failed**. Check the file size and extension, then open it in supported software such as Canon’s [Digital Photo Professional](https://support.usa.canon.com/kb/s/article/ART173585) or an up-to-date photo editor that supports your camera’s files.

## [📡 Transfer Photos from Canon to a Computer Without a Cable](#transfer-photos-from-canon-to-a-computer-without-a-cable)

Wireless transfer is convenient once set up, but it depends on the camera model, Canon software, computer, and network configuration.

### [Wi-Fi Setup, Bluetooth Pairing, and Wireless Transfer Limits](#wi-fi-setup-bluetooth-pairing-and-wireless-transfer-limits)

For supported models using Canon Image Transfer Utility 2, Canon’s [wireless transfer instructions](https://support.usa.canon.com/kb/s/article/ART171790) describe installing the utility, pairing the camera and computer, enabling automatic image sending, and selecting transfer conditions.

A general setup looks like this:

1. Check Canon’s support page to confirm your camera supports the utility and feature.
2. Install Image Transfer Utility 2 from Canon.
3. Open the utility and follow its pairing instructions.
4. Enable the camera’s Wi-Fi and automatic transfer settings, using your model’s manual for the exact menu path.
5. Confirm the correct computer is paired and set the destination folder.
6. Keep the computer utility running if the workflow requires it.
7. Check the destination folder after the camera sends the files.

Canon notes that the automatic-transfer process can depend on the camera starting up within range of the access point, and that the utility must be running for its wireless workflow. The support instructions also warn that battery power matters during automatic transfer. These are **feature-specific instructions, not universal behavior across every Canon model**.

Bluetooth pairing alone does not guarantee that full-resolution photos can be transferred directly to a computer. Check your camera’s manual for the supported connection type and destinations.

## [🧰 Canon Transfer Software, Drivers, and Compatibility](#canon-transfer-software-drivers-and-compatibility)

The right software depends on what you want to do. Basic copying often needs no Canon application, but Canon’s tools can provide model-specific transfers and workflows.

### [EOS Utility, Camera Connect, and Operating-System Tools](#eos-utility-camera-connect-and-operating-system-tools)

| Tool | Typical role | Best when |
|---|---|---|
| EOS Utility | Import images and use supported Canon camera workflows | You want Canon’s computer software and its batch or selected-image options |
| Image Transfer Utility 2 | Wireless automatic transfer for supported setups | Your camera and computer meet Canon’s compatibility requirements |
| Camera Connect | Connection between compatible Canon cameras and mobile devices | You want to move or view images on a phone or tablet |
| Windows Photos / File Explorer | Import or copy files on Windows | You want built-in tools |
| Photos / Image Capture / Finder | Import or copy files on Mac | You want built-in macOS tools |
| Digital Photo Professional | View and process Canon images | You want Canon’s image-processing software after transfer |

Download software only from Canon’s official [support and downloads page](https://support.usa.canon.com/kb/s/article/ART173585), and check that the listed version supports both your camera and operating system. A cable transfer may work without EOS Utility, but wireless features and camera-specific functions can require Canon software.

### [Older Canon EOS Rebel and PowerShot Cameras](#older-canon-eos-rebel-and-powershot-cameras)

Older cameras can still transfer photos perfectly well, but **the connection standard, card type, operating-system support, and software options may differ** from modern models.

For a camera such as the **Canon EOS Rebel 350D**, try a compatible card reader first if the camera cable original software is difficult to locate. If using a direct connection, check the camera manual and Canon support information for the required cable and software. The [community question about transferring photos from an old EOS Rebel 350D](https://photo.stackexchange.com/questions/89871/how-can-i-transfer-photos-from-an-old-canon-rebel-eos-350d-to-my-computer) is a relevant discussion, but the page content may not always be accessible; treat the camera manual and working hardware compatibility as the dependable checks.

For old cards, inspect their labels and match the reader to the card format. Don’t force a card into a slot that doesn’t fit. A reader with the correct slot is usually safer than experimenting with adapters.

## [🛠️ Fix Canon Camera Connection and Import Problems](#fix-canon-camera-connection-and-import-problems)

Most transfer problems come down to a cable, connection mode, card reader, permissions, or unsupported file preview. Work through the basics before changing camera settings.

### [Computer Does Not Recognize the Camera](#computer-does-not-recognize-the-camera)

Try these steps in order:

1. Confirm the camera is on and has enough battery power.
2. Try a different USB port.
3. Test a **data-capable** cable; charging-only cables are a common culprit.
4. Turn the camera off, reconnect it, then turn it on.
5. Check whether the camera offers a USB or connection-mode selection.
6. Restart the computer and camera.
7. Try a compatible card reader to find out whether the card itself is readable.
8. Check Canon’s support page for camera-specific software or operating-system compatibility.

If the card reader works but the camera connection does not, the issue likely lies in the cable, camera connection mode, or software—not necessarily the photos.

### [Photos Will Not Import or the Transfer Stops](#photos-will-not-import-or-the-transfer-stops)

- Check that the destination drive has enough free space.
- Try importing a smaller group of files.
- Avoid moving the camera or disconnecting the cable mid-transfer.
- For wireless imports, confirm the camera and computer are paired and the required utility is open.
- For large video files, allow extra time; Canon specifically notes that movies can take longer to transfer in EOS Utility.
- Try copying with a card reader to separate a software issue from a card or file issue.

If a transfer stops, **don’t format the card**. Reconnect it and copy the files that remain, then verify your completed copies.

### [Unsupported Files, Missing Images, and Permission Issues](#unsupported-files-missing-images-and-permission-issues)

If a file appears on the card but won’t preview:

- Check its extension and file size.
- Try another compatible application.
- Confirm you copied the full file rather than a shortcut or preview.
- Look through all relevant card folders.
- Check your computer’s storage permissions and destination-folder access.
- Confirm the image wasn’t filtered out by date, format, or import settings.

A RAW image may transfer correctly even when your default photo viewer cannot open it. Use software that supports the particular Canon RAW format and camera model.

## [🔒 Protect Your Photos After Transferring](#protect-your-photos-after-transferring)

A successful progress bar is encouraging, but it isn’t proof every image is safe. The dependable workflow is **copy, verify, back up, then clear the card when you’re ready**.

### [Verify Copies Before Deleting Images from the Memory Card](#verify-copies-before-deleting-images-from-the-memory-card)

Before deleting or formatting anything:

- Confirm the destination folder contains the expected files.
- Open several images from different points in the shoot.
- Check a RAW file and a video too, if you shot them.
- Compare the file count with the number of images you expected.
- Keep the memory card unchanged if anything looks missing.

### [Back Up Canon Photos to an External Drive or Cloud Storage](#back-up-canon-photos-to-an-external-drive-or-cloud-storage)

For important work, keep another copy on a separate drive or in a reputable cloud backup service. A computer’s internal drive is convenient, but it is not a backup if that same computer is lost, damaged, or stolen.

A practical routine:

1. Copy from the card to your computer.
2. Verify the imported files.
3. Copy the project folder to an external drive or backup destination.
4. Confirm the backup completed.
5. Only then consider clearing the card in-camera.

We use this routine for family trips and paid shoots alike. The photos you forgot you took often turn out to be the ones you’re most glad you kept.

## [✅ Canon Photo Transfer Checklist](#canon-photo-transfer-checklist)

- ✅ Choose a cable, card reader, or supported wireless method.
- ✅ Confirm your cable supports data transfer.
- ✅ Copy originals to a clearly named folder.
- ✅ Include RAW files, JPEGs, and videos you want to keep.
- ✅ Wait for the transfer to complete.
- ✅ Open sample files and check the file count.
- ✅ Make a second copy of important photographs.
- ✅ Eject the card safely.
- ❌ Don’t format the card until the copies are verified and backed up.