Support our educational content for free when you purchase through links on our site. Learn more
32 Essential Photography Tips for Beginners 📸 (2025)
Diving into photography can feel like stepping into a dazzling maze of buttons, settings, and endless possibilities. But what if we told you that mastering the art of capturing stunning images doesn’t require fancy gear or years of experience? At Camera Brands™, we’ve distilled decades of expertise into 32 essential tips that will transform your snapshots from “meh” to magnificent — whether you’re wielding a DSLR, mirrorless camera, or just your smartphone.
Did you know that nearly 80% of beginner photographers struggle most with understanding exposure and composition? Stick with us, and you’ll not only unravel these mysteries but also discover insider secrets like when to ditch auto mode, how to chase golden hour light like a pro, and why moving your feet might be your best photographic tool. Plus, we’ll share a must-watch video that teaches 80% of photography in just 10 minutes — talk about a shortcut to brilliance!
Ready to turn your passion into jaw-dropping photos? Let’s embark on this creative journey together.
Key Takeaways
- Master your current camera first — you don’t need the latest model to take great photos.
- Understand the exposure triangle: aperture, shutter speed, and ISO control brightness and mood.
- Use composition techniques like the Rule of Thirds, leading lines, and negative space to create compelling images.
- Light is your best friend: shoot during golden hour and learn to work with different lighting conditions.
- Keep your gear in top shape — clean lenses and use quality filters to avoid image degradation.
- Embrace post-processing to enhance your photos but avoid over-editing.
- Practice regularly, experiment boldly, and connect with other photographers to grow your skills.
- Always back up and organize your photos to protect your digital memories.
Ready to start snapping? Scroll down and let’s make your photography journey unforgettable!
Table of Contents
- ⚡️ Quick Tips and Facts
- Unveiling the Lens: A Brief History of Photography for Aspiring Artists
- Start with What You Have: Mastering Your First Camera 📸
- Demystifying Exposure: The Holy Trinity of Photography
- Mastering Composition: Guiding the Viewer’s Eye
- Harnessing the Power of Light: Your Best Friend (or Foe!)
- Essential Gear & Accessories for the Budding Photographer
- Post-Processing Prowess: Bringing Your Images to Life
- Beyond the Basics: Elevating Your Photographic Journey
- 21. Practice, Practice, Practice: Shoot a Lot and Experiment!
- 22. Don’t Overexpose Highlights: Preserve Those Details!
- 23. Take Your Time: Patience is a Virtue in Photography
- 24. Work with the Scene in Front of You: See the Potential
- 25. Be More Selective: Quality Over Quantity
- 26. Revisit Your Old Photos: A Goldmine of Learning
- 27. Fix Your Weak Points: Self-Critique for Growth
- 28. Try Something New: Break Out of Your Comfort Zone!
- 29. Connect with Other Photographers: Learn and Share 🤝
- 30. Spend Less Time on Social Media, More Time Shooting!
- 31. Back Up Your Photos: Your Digital Treasures Depend On It! 💾
- 32. Have Fun! The Most Important Tip of All 🎉
- Conclusion: Your Photographic Journey Begins Now!
- Recommended Links: Further Reading & Resources
- Reference Links: Our Sources & Inspirations
⚡️ Quick Tips and Facts
Welcome to the exciting world of photography! At Camera Brands™, we know that starting out can feel like stepping into a labyrinth of buttons, settings, and jargon. But fear not — we’re here to guide you through the essentials with some quick, actionable tips that will get you shooting like a pro in no time.
- Start simple: Use the camera you already own — be it a DSLR, mirrorless, or even your smartphone. Mastering your gear beats chasing the latest shiny model. (More on this in Start with What You Have)
- Understand exposure: Aperture, shutter speed, and ISO are your holy trinity. Balancing these controls your photo’s brightness and mood.
- Composition matters: Use the Rule of Thirds, leading lines, and negative space to make your shots pop.
- Light is king: Golden hour (just after sunrise or before sunset) creates magical light. Avoid harsh midday sun.
- Keep your lens clean: A smudged lens = blurry photos. Use a microfiber cloth regularly.
- Don’t overexpose highlights: Blown-out whites can’t be fixed later.
- Shoot in RAW: Gives you more editing flexibility.
- Back up your photos: Hard drives fail; keep multiple copies.
- Have fun! Photography is about joy and creativity, not stress.
Curious how to balance those exposure settings or why your photos sometimes look flat? Stick with us — we’ll unravel these mysteries and more.
For a quick visual guide on exposure basics, check out the first YouTube video embedded later in this article — it’s a game-changer!
Unveiling the Lens: A Brief History of Photography for Aspiring Artists

Before we dive into tips, let’s take a quick stroll down memory lane. Photography has evolved from the early 19th-century daguerreotype process to today’s digital marvels. Understanding this evolution helps you appreciate the tools and techniques you wield.
- 1839: Louis Daguerre introduces the daguerreotype, the first practical photographic process.
- Late 1800s: Film cameras become popular; photographers experiment with exposure and composition.
- 1975: Kodak invents the first digital camera prototype.
- 2000s: Mirrorless cameras rise, offering compactness and versatility.
- Today: Smartphones rival DSLRs in image quality, democratizing photography.
This rich history is why we have such powerful tools at our fingertips. And guess what? You don’t need to be a tech wizard to take stunning photos — just a bit of curiosity and practice.
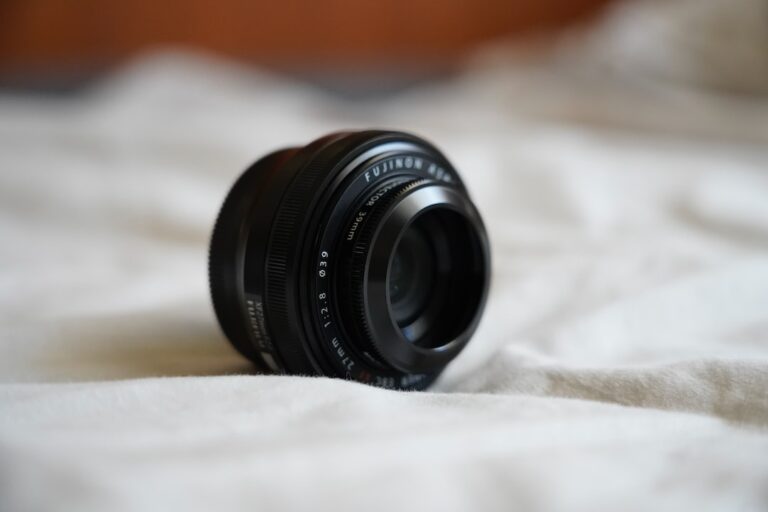
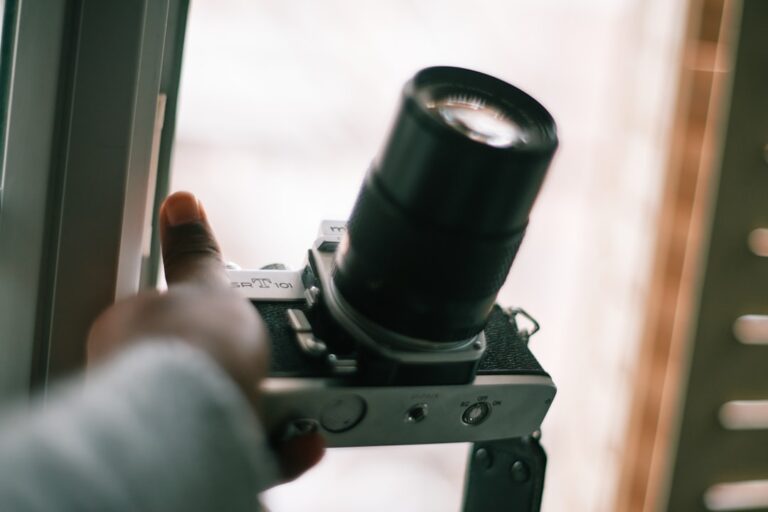
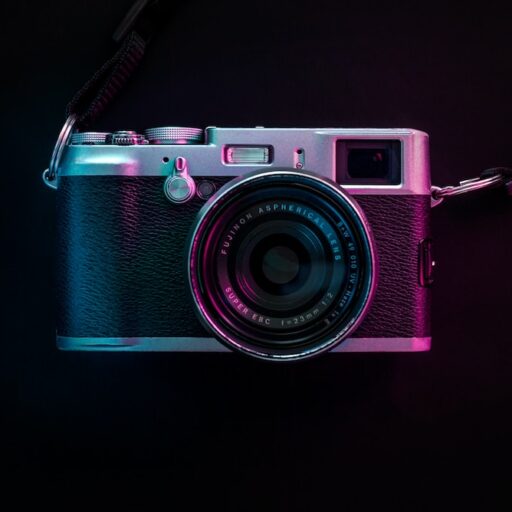
Start with What You Have: Mastering Your First Camera 📸
Understanding Your Camera’s Anatomy & Basic Functions
We often hear beginners say, “I need a fancy camera to take good photos.” Nope! The best camera is the one you have. Whether it’s a Canon EOS Rebel T7, Nikon D3500, Sony Alpha a6000, or your trusty iPhone, mastering it is your first step.
Key parts to know:
| Part | Function |
|---|---|
| Lens | Focuses light onto the sensor |
| Shutter Button | Takes the photo |
| Mode Dial | Switches between Auto, Manual, and presets |
| Viewfinder/Screen | Shows your composition |
| ISO Button | Adjusts sensor sensitivity |
| Aperture Ring (on some lenses) | Controls depth of field |
Pro Tip: Spend a day just exploring your camera’s buttons and menus. Try shooting in different modes and see how the image changes.
Unlocking Your Smartphone’s Photographic Potential 📱
Smartphones like the iPhone 14 Pro, Samsung Galaxy S23 Ultra, and Google Pixel 7 pack incredible cameras. Here’s how to get the most out of them:
- Use portrait mode for blurred backgrounds.
- Tap to focus on your subject.
- Adjust exposure by sliding your finger up/down.
- Experiment with night mode for low light.
- Use third-party apps like Halide or ProCam for manual controls.
Smartphones are perfect for learning composition and lighting without worrying about complex settings.
Demystifying Exposure: The Holy Trinity of Photography
Exposure controls how bright or dark your photo is. It’s a dance between three settings:
1. Aperture: The Art of Depth and Light
- Measured in f-stops (e.g., f/1.8, f/5.6, f/16).
- Lower f-number = larger opening = more light + shallow depth of field (blurry background).
- Higher f-number = smaller opening = less light + deep depth of field (everything in focus).
2. Shutter Speed: Freezing Motion or Embracing Blur
- Measured in seconds or fractions (e.g., 1/1000, 1/60, 2 seconds).
- Fast shutter speed freezes action (great for sports or wildlife).
- Slow shutter speed creates motion blur (waterfalls, light trails).
3. ISO: Navigating Light Sensitivity and Grain
- ISO 100 is least sensitive (cleanest image).
- Higher ISO (e.g., 1600, 3200) brightens image but adds grain/noise.
- Use higher ISO only when necessary (low light).
Balancing the Trio: Achieving Perfect Exposure Every Time
Here’s a quick workflow:
- Set ISO based on light conditions.
- Choose aperture for desired depth of field.
- Adjust shutter speed to get correct brightness and motion effect.
If your photo is too dark, try slowing shutter speed or opening aperture before raising ISO to avoid noise.
Mastering Composition: Guiding the Viewer’s Eye
Composition is how you arrange elements in your frame to tell a story or evoke emotion.
4. The Rule of Thirds: Your First Compositional Friend
Imagine dividing your frame into a 3×3 grid. Place your subject along these lines or intersections for a balanced, natural look.
5. Leading Lines & Framing: Drawing Attention In
Use roads, fences, or natural lines to lead the viewer’s eye to your subject. Frame your subject with elements like branches or windows.
6. Symmetry & Patterns: Finding Harmony
Symmetry can create striking images, especially in architecture or reflections. Patterns add texture and interest.
7. Negative Space: Less is Often More
Empty space around your subject can emphasize it and create a minimalist feel.
8. Changing Your Perspective: Move Your Feet! 🚶 ♀️
Don’t just shoot from eye level. Get low, climb higher, or move around to find unique angles.
9. Paying Attention to the Edges: No Distractions Allowed!
Check your frame edges for distracting objects or cropped limbs. Clean edges keep focus on your subject.
Harnessing the Power of Light: Your Best Friend (or Foe!)
Light shapes your photo’s mood, texture, and clarity.
10. Understanding Natural Light: Golden Hour Magic ✨
The hour after sunrise and before sunset bathes scenes in warm, soft light — perfect for portraits and landscapes.
11. Dealing with Harsh Light: When the Sun is Too Strong
Midday sun creates harsh shadows. Use shade, reflectors, or fill flash to soften.
12. Low Light Photography: Embracing the Shadows
Use a tripod, open aperture wide, and increase ISO carefully. Shoot in RAW for better editing.
13. When to Use a Flash (and How Not To!) 💡
Flash can fill shadows outdoors or light dark scenes indoors. Avoid direct flash that causes harsh shadows — bounce or diffuse it instead.
Essential Gear & Accessories for the Budding Photographer
14. The Indispensable Tripod: Stability for Sharpness
Tripods are lifesavers for landscapes, night shots, and macro photography. They eliminate camera shake and let you use slow shutter speeds.
Our top picks:
| Tripod Model | Stability | Portability | Max Load | Rating (1-10) |
|---|---|---|---|---|
| Manfrotto Befree Live | 9 | 8 | 8 kg | 9 |
| Joby GorillaPod 3K | 7 | 10 | 3 kg | 8 |
| Benro TMA38CL | 10 | 6 | 12 kg | 9 |
15. Lens Filters: Friend or Foe? (Hint: Don’t Use a Cheap One!)
Cheap filters can degrade image quality with flare and softness. If you want protection or effects, invest in reputable brands like B+W or Hoya.
16. Keeping It Clean: The Importance of Lens Care 🧼
A clean lens is your first step to sharp photos. Use:
- Microfiber cloths
- Lens cleaning solution
- Air blowers for dust
Avoid household tissues or your shirt!
17. Storage Solutions: Memory Cards & External Drives
Always carry extra SD cards (preferably UHS-II for speed). Back up photos to external SSDs or cloud services like Backblaze or Google Photos.
Post-Processing Prowess: Bringing Your Images to Life
18. Learning Basic Editing: Enhancing, Not Overdoing
Editing can transform your photos but avoid the “Instagram filter” trap. Focus on:
- Adjusting exposure and contrast
- Correcting white balance
- Sharpening details
- Cropping for better composition
19. Essential Software: Free vs. Paid Options (Lightroom, GIMP, etc.)
| Software | Type | Features | Best For |
|---|---|---|---|
| Adobe Lightroom | Paid | Non-destructive editing, presets | Beginners to pros |
| Adobe Photoshop | Paid | Advanced retouching | Advanced users |
| GIMP | Free | Powerful but complex | Budget-conscious beginners |
| Darktable | Free | RAW editing | Open-source enthusiasts |
20. Organizing Your Digital Assets: A Photographer’s Best Practice 🗄️
Use folders by date and event (e.g., 2024 > 06_June > Wedding). Tag photos with keywords in Lightroom or similar software for easy retrieval.
Beyond the Basics: Elevating Your Photographic Journey
21. Practice, Practice, Practice: Shoot a Lot and Experiment!
The old saying “Your first 10,000 photos are your worst” holds some truth. Don’t be afraid to make mistakes — they’re your best teachers.
22. Don’t Overexpose Highlights: Preserve Those Details!
Highlights are unforgiving. Use your camera’s histogram or highlight warnings (“zebra stripes”) to avoid clipping.
23. Take Your Time: Patience is a Virtue in Photography
Don’t rush. Compose carefully, check settings, and review shots in the field.
24. Work with the Scene in Front of You: See the Potential
Avoid forcing a preconceived idea. Adapt to the light, weather, and environment for authentic photos.
25. Be More Selective: Quality Over Quantity
Showcase your best images. It’s tempting to share everything, but a curated portfolio shines brighter.
26. Revisit Your Old Photos: A Goldmine of Learning
Look back at your early work to spot progress and areas to improve. You might find hidden gems worth re-editing.
27. Fix Your Weak Points: Self-Critique for Growth
Identify what confuses you — be it manual focus, composition, or editing — and dedicate time to mastering it.
28. Try Something New: Break Out of Your Comfort Zone!
Experiment with macro, long exposure, or street photography. Variety fuels creativity.
29. Connect with Other Photographers: Learn and Share 🤝
Join local photo clubs or online communities like Flickr, 500px, or Reddit’s r/photography. Sharing feedback accelerates growth.
30. Spend Less Time on Social Media, More Time Shooting!
Social media can be distracting. Use it sparingly for inspiration, but prioritize actual shooting.
31. Back Up Your Photos: Your Digital Treasures Depend On It! 💾
Follow the 3-2-1 backup rule:
- 3 copies of your photos
- 2 different storage media (e.g., external drive + cloud)
- 1 off-site backup (in case of fire or theft)
Featured Video: Mastering 80% of Photography in 10 Minutes
If you’re eager to grasp the essentials fast, check out this YouTube video that teaches 80% of photography in just 10 minutes. It brilliantly explains ISO, aperture, and shutter speed with practical examples — perfect for beginners who want to skip the fluff and get shooting!
We’ve covered a lot of ground, from gear basics to creative mindset. Ready to dive deeper? Our next section, Conclusion, wraps up with final thoughts and resources to keep your photography journey thriving.
Related Reading on Camera Brands™:
Explore our Digital Camera Guide for detailed reviews and buying tips tailored for beginners and pros alike!
Conclusion: Your Photographic Journey Begins Now!

Congratulations! You’ve just unlocked a treasure trove of photography wisdom designed to turn any beginner into a confident shooter. From mastering your current camera to understanding the magic of light and composition, you now have the tools to create compelling images that tell your unique story.
Remember, gear is just a tool—the real magic happens when you learn to see the world through your lens with curiosity and patience. Whether you’re shooting with a Canon EOS Rebel T7, a Sony Alpha a6000, or your smartphone, the principles of exposure, composition, and light remain your steadfast companions.
We also addressed some lingering questions: How do you avoid overexposed highlights? Use your camera’s histogram and adjust ISO, shutter speed, and aperture accordingly. How do you keep your photos sharp? Use a tripod when needed and keep your lens clean. What about post-processing? Start simple, enhance subtly, and organize your digital library to keep your workflow smooth.
Photography is a journey, not a destination. Embrace experimentation, connect with fellow photographers, and most importantly, have fun! Your best shots are waiting just around the corner.
Recommended Links: Further Reading & Resources
Ready to gear up or deepen your knowledge? Here are some trusted products and books loved by our Camera Brands™ team:
Cameras & Accessories
-
Canon EOS Rebel T7:
Amazon | B&H Photo | Canon Official Website -
Sony Alpha a6000:
Amazon | B&H Photo | Sony Official Website -
Manfrotto Befree Live Tripod:
Amazon | B&H Photo | Manfrotto Official Website -
B+W Lens Filters:
Amazon | B&H Photo | B+W Official Website
Books for Beginners
-
Understanding Exposure by Bryan Peterson — A classic that demystifies exposure in a friendly, engaging way.
Amazon -
The Digital Photography Book by Scott Kelby — Practical tips and tricks from a pro’s perspective.
Amazon -
The Photographer’s Eye by Michael Freeman — Dive deep into composition and visual storytelling.
Amazon
Frequently Asked Questions (FAQ)
 by Camera Brands")
What are the essential camera settings every beginner should know?
Aperture, shutter speed, and ISO form the core of your camera’s exposure triangle. Aperture controls how much light enters and affects depth of field; shutter speed controls how long the sensor is exposed and affects motion blur; ISO adjusts sensor sensitivity but can introduce noise at high levels. Beginners should practice shooting in Aperture Priority mode to control depth of field while letting the camera handle shutter speed, then gradually experiment with Manual mode for full control.
Additionally, understanding autofocus modes (single vs. continuous) and shooting in RAW format will greatly improve your image quality and flexibility in post-processing.
Read more about “Canon EOS Uncovered: 15 Must-Know Facts & Features for 2025 📸”
How can beginners improve composition in photography?
Start with the Rule of Thirds—imagine a tic-tac-toe grid and place your subject along the lines or intersections. Use leading lines like roads or fences to guide the viewer’s eye. Pay attention to negative space to avoid clutter and emphasize your subject. Don’t forget to move your feet—changing your angle or perspective can transform a mundane shot into something extraordinary. Lastly, always check the edges of your frame to eliminate distractions.
Read more about “Sony Camera Mastery: 6 Expert Picks & Secrets for 2025 📸”
What lighting tips help beginners take better photos?
Lighting is the heart of photography. Aim to shoot during the golden hour—the hour after sunrise or before sunset—for soft, warm light. Avoid harsh midday sun that creates strong shadows and blown highlights. If shooting in harsh light, use shade or a reflector to soften shadows. For low light, open your aperture wide, increase ISO carefully, and consider using a tripod to avoid blur. When necessary, use flash as fill light rather than direct illumination to maintain natural-looking photos.
Read more about “How Can I Improve the Image Quality of My Digital Camera Photos? 📸 (2025)”
Which lenses are best for beginner photographers?
For beginners, a standard zoom lens like the Canon EF-S 18-55mm f/3.5-5.6 or Nikon AF-P DX 18-55mm is versatile and affordable. These cover wide-angle to short telephoto focal lengths, ideal for landscapes, portraits, and everyday shooting. As you grow, consider a prime lens like a 50mm f/1.8 (“nifty fifty”) for sharp images and beautiful background blur at a budget-friendly price.
For wildlife or sports, telephoto lenses (e.g., 70-300mm) are essential to get close to distant subjects. Remember, lens choice depends on your interests and shooting style, so experiment to find what excites you most.
How important is post-processing for beginners?
Post-processing is a powerful tool to enhance your photos, correct minor issues, and express your creative vision. Beginners should start with basic adjustments: exposure, contrast, white balance, and cropping. Software like Adobe Lightroom offers a friendly interface and non-destructive editing. Avoid over-editing; subtlety is key to maintaining natural-looking images.
Read more about “Top 7 DSLR Camera Companies to Know in 2025 📸”
How can beginners organize and back up their photos effectively?
A solid organization system saves time and heartache. Create folders by year and event (e.g., 2024 > 06_June > Family Picnic). Use tagging features in software like Lightroom to add keywords for easy searching. Always back up your photos following the 3-2-1 rule: keep three copies, on two different media types (external drive and cloud), with one copy off-site. Services like Backblaze or Google Drive offer reliable cloud backup options.
Reference Links: Our Sources & Inspirations
- Photography Life: Photography Tips for Beginners — A comprehensive guide emphasizing composition, exposure, and practical advice.
- Kevin Pepper Photography: Beginner’s Guide to Wildlife Photography — Expert tips on gear and techniques for wildlife shooters.
- SLR Photography Guide: Bird Photography Tips for Beginners – SLR Photography Guide — Detailed insights into camera settings and lens choices for bird photography.
- Canon Official Website
- Sony Imaging
- Manfrotto Official Website
- B+W Filters
- Adobe Lightroom
- Backblaze Cloud Backup
We hope this guide lights your path to photographic mastery. Remember, every expert was once a beginner — so grab your camera, step outside, and start capturing those unforgettable moments! 📷✨