Support our educational content for free when you purchase through links on our site. Learn more
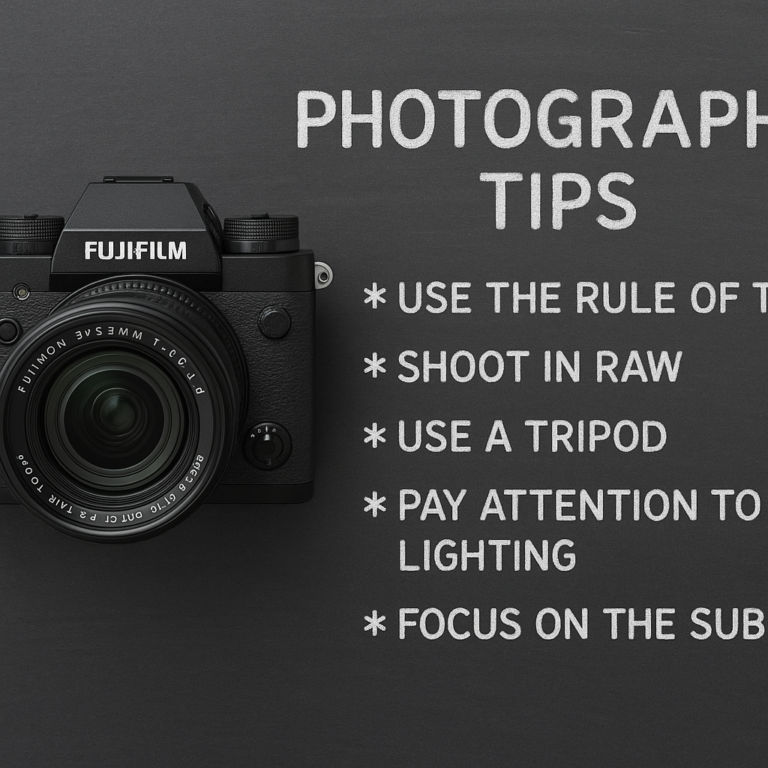
📸 15+ Ultimate Fujifilm Photography Tips & Tricks (2026)
Ever picked up a Fujifilm camera, felt the satisfying click of the dials, and then stared at the screen wondering, “Why don’t my photos look like the ones on Instagram?” You aren’t alone. We’ve all been there, fumbling through menus while the perfect light fades, only to capture a flat, uninspired image. The secret isn’t just in the lens; it’s in unlocking the X-Trans sensor’s hidden potential and mastering the Film Simulations that make Fujifilm legendary.
In this comprehensive guide, we’re pulling back the curtain on the 15+ essential tips and tricks that separate the amateurs from the pros. From the “SAINT” exposure method that will save your street shots to the White Balance Shift hack that creates that mody, cinematic look instantly, we’ve got you covered. We’ll even reveal why relying on the DR20% setting might be holding you back and how to customize your C1-C7 presets for lightning-fast workflow. Whether you’re wielding an X-T30, X-Pro3, or the latest X-H2, these strategies will transform the way you see the world.
Key Takeaways
- Master the “SAINT” Method: Learn to set Shutter, Aperture, and ISO intelligently to handle any lighting condition without missing a beat.
- Unlock Film Simulations: Discover how to tweak Classic Chrome and Classic Neg. with Highlight/Shadow Tone adjustments for that signature Fuji look straight out of camera.
- Optimize Your Workflow: Utilize Custom Presets (C1-C7) and the Q Menu to switch between street, portrait, and landscape modes instantly.
- Ditch the Auto-White Balance: Use WB Shift to correct color casts and add creative flair, a technique often overlooked by beginners.
- Respect Base ISO: Understand why shooting at Base ISO often yields better dynamic range than digital DR settings.
👉 Shop Fujifilm Cameras & Lenses:
- Fujifilm X-Series Cameras: Amazon | B&H Photo | Fujifilm Official
- Fujinon Lenses: Amazon | B&H Photo | Fujifilm Official
Table of Contents
- ⚡️ Quick Tips and Facts
- 📜 The Fuji Legacy: A Brief History of Fujifilm Photography
- 🎨 Mastering Fujifilm Film Simulations: The Ultimate Guide to X-Trans Magic
- 📸 15 Essential Fujifilm Photography Tips and Tricks for Instant Mastery
- 1. Unlock the Power of the Q Menu for Lightning-Fast Adjustments
- 2. Dial in the Perfect Exposure Compensation with the Dedicated Ring
- 3. Harness the Art of Dynamic Range (DR) Settings for High-Contrast Scenes
- 4. Leverage Advanced Filter Modes for Creative In-Camera Effects
- 5. Master Focus Area and Zone Selection for Sharp Subjects
- 6. Utilize Focus Lock and Back-Button Focus for Precision
- 7. Optimize ISO Auto Minimum Shutter Speed to Prevent Motion Blur
- 8. Discover the Hidden Gems of Custom Presets (C1-C7)
- 9. Perfect Your White Balance Shifts for That Signature Fuji Look
- 10. Navigate the Menu System Like a Pro with My Menu
- 1. Use the Electronic Level to Keep Your Horizon Straight
- 12. Experiment with Grain Effect for Analog Texture
- 13. Master the Art of Highlight and Shadow Tone Adjustments
- 14. Utilize Focus Check and Focus Peaking for Manual Focus Mastery
- 15. Leverage the Built-in Flash and External Shoe Mount Options
- 🔍 Deep Dive: Understanding X-Trans Sensor Technology and Color Science
- 🎒 Best Fujifilm Lenses for Every Photography Style and Budget
- 📱 Fujifilm XApp and Remote Control: Connecting Your Camera to Your Smartphone
- 🛠️ Customizing Your Fujifilm Camera: Buttons, Dials, and Workflow Hacks
- 🌟 Fujifilm Photography Tips for Specific Genres: Portrait, Landscape, and Street
- 🚫 Common Fujifilm Mistakes and How to Avoid Them
- 🔎 Search the Site for More Camera Gear Reviews
- 📢 Follow Us for Daily Photography Inspiration
- 💬 Leave a Reply: Share Your Best Fuji Shot
- 🏁 Conclusion: Embracing the Fuji Way of Seeing
- 🔗 Recommended Links for Fujifilm Enthusiasts
- ❓ FAQ: Your Burning Questions About Fujifilm Cameras Answered
- 📚 Reference Links and Sources
⚡️ Quick Tips and Facts
Before we dive into the deep end of the Fujifilm ocean, let’s grab a life jacket and hit the surface with some high-impact, actionable nugets that will instantly upgrade your photography game. We’ve all been there: you’re holding a beautiful, retro-styled camera, feeling like a cool street photographer, but your photos look… well, a bit flat. Why? Because you’re likely ignoring the secret sauce that makes Fujifilm unique.
Here is the Camera Brands™ cheat sheet for immediate success:
- The “Base ISO” Myth: Many beginners think cranking up the “Dynamic Range” setting (DR20% or DR40%) is the magic bullet for high-contrast scenes. Spoiler alert: It’s not. As noted by experts like Kristoffer Trole, shooting at your camera’s Base ISO (usually ISO 160 for X-T3/X-Pro3, or ISO 20 for older models) yields significantly better dynamic range than the digital DR settings, which often just clip shadows to make highlights look better.
- The “SAINT” ISO Method: Stuck on exposure? Remember SAINT: Shutter, Aperture, Immovable. Now Trust ISO. Set your creative limits (Shutter/Aperture), set ISO to Auto, and let the camera handle the rest. It’s a game-changer for street photography.
- JPEG vs. RAW: If you shoot JPEG, you must master Film Simulations. If you shoot RAW, you still need to understand them because they serve as the starting point for your post-processing workflow in Lightroom or Capture One.
- Focus Peaking isn’t King: While helpful, relying solely on focus peaking for manual focus can be tricky. The Zoom In button is often your most reliable ally for pixel-peping accuracy.
- The “Underexpose” Strategy: In high-contrast light, Fujifilm sensors love to preserve highlights. Don’t be afraid to underexpose by 1 to 2 stops and lift the shadows in post. It’s better than blowing out a sky.
Did you know? The X-Trans sensor, found in most Fujifilm APS-C cameras, uses a unique color filter array that eliminates the need for an optical low-pass filter, resulting in incredible sharpness straight out of the camera. But it also means your post-processing software needs to be up to the task!
For a deeper dive into the ecosystem, check out our comprehensive guide on Fujifilm Cameras to see how they stack up against the competition.
📜 The Fuji Legacy: A Brief History of Fujifilm Photography

To truly master the art of Fujifilm photography, you have to understand the soul of the machine. It’s not just a camera; it’s a time capsule of analog heritage.
Fujifilm didn’t just decide to make digital cameras; they spent decades perfecting the chemistry of film. When the digital revolution hit, many film giants crumbled. Fujifilm, however, pivoted. They took their deep understanding of color science and emulsion characteristics and translated it into the digital realm.
The Birth of X-Trans
In 2012, with the launch of the X-Pro1, Fujifilm introduced the X-Trans sensor. This was a radical departure from the standard Bayer pattern used by Sony, Canon, and Nikon.
- The Problem: Bayer sensors require an optical low-pass filter (OLPF) to prevent moiré, which softens the image.
- The Fuji Solution: A pseudo-random 6×6 color filter array that mimics the randomness of film grain, allowing them to remove the OLPF.
- The Result: Images with exceptional sharpness and a unique rendering that feels organic, not digital.
The Film Simulation Revolution
While other brands were obsessed with megapixels, Fujifilm was obsessed with mood. They launched Film Simulations (Provia, Velvia, Astia, Classic Chrome, etc.) that emulated their legendary film stocks.
- Provia: The standard, balanced look.
- Velvia: High saturation and contrast, perfect for landscapes.
- Classic Chrome: The mody, desaturated look that defined a generation of street photography.
Why does this matter to you? Because when you shoot a Fujifilm, you aren’t just capturing data; you’re capturing a pre-processed aesthetic. This is why so many photographers fall in love with the “Fuji Look” immediately.
🎨 Mastering Fujifilm Film Simulations: The Ultimate Guide to X-Trans Magic
This is where the magic happens. If you’ve ever looked at a Fujifilm JPEG and thought, “How did they get that color?”, the answer lies in Film Simulations. These aren’t just filters; they are complex algorithms that adjust tone curves, saturation, and color phase.
The Big Three: Provia, Velvia, and Astia
- Provia (Standard): The default. It’s accurate, neutral, and reliable. Think of it as your “safe” bet.
- Velvia (Vivid): Crank up the saturation and contrast. This is the go-to for landscapes and nature. It makes greens grener and blues bluer.
- Astia (Soft): Lower contrast and softer skin tones. Perfect for portraits where you want a gentle, flattering look.
The Modern Classics: Classic Chrome & Classic Neg.
- Classic Chrome: Introduced with the X-T2, this simulation desaturates colors and adds a slight green/magenta shift. It’s the street photography king. It makes mundane scenes look cinematic and mody.
- Classic Neg.: A newer addition that mimics the look of Fujifilm’s Superia film. It offers high contrast, deep blacks, and a unique color palette that feels very “retro-modern.”
Advanced Customization: The “Secret Sauce”
Don’t just stick to the presets! You can tweak every simulation:
- Highlight Tone: Adjusts the brightness of the highlights. -2 (Soft) is great for preserving sky detail.
- Shadow Tone: Adjusts the darkness of shadows. +2 (Hard) adds punch; -2 (Soft) lifts shadows for a flatter look.
- Color: Saturation levels.
- Sharpness: Crispness of edges.
- Grain Effect: Adds analog texture.
- White Balance Shift: The most powerful tool. Shift towards Blue/Amber or Green/Magenta to create custom looks.
Pro Tip: Many photographers set their camera to RAW + JPEG. You get the instant beauty of the JPEG for social media, and the RAW file for post-processing flexibility.
For more on how these simulations compare to post-processing in Lightroom, check out our Camera Features section.
📸 15 Essential Fujifilm Photography Tips and Tricks for Instant Mastery
Ready to stop fumbling with menus and start shooting? Here are 15 essential tips to transform your Fujifilm experience from “good” to “legendary.”
1. Unlock the Power of the Q Menu for Lightning-Fast Adjustments
The Q Menu is your command center. By default, it holds 12 slots, but you can customize it to hold your most-used settings.
- Action: Press the Q button.
- Strategy: Fill the slots with things you change often: ISO, White Balance, Film Simulation, Drive Mode, and Focus Area.
- Why? It saves you from diving into the deep menu system every time the light changes.
2. Dial in the Perfect Exposure Compensation with the Dedicated Ring
Unlike most cameras where you hold a button and scroll a wheel, Fujifilm gives you a physical dial for Exposure Compensation (EC).
- The Benefit: You can adjust exposure by 1/3 stop increments instantly, even while looking through the viewfinder.
- Technique: In Aperture Priority (A mode), turn the dial to brighten or darken the image without changing your aperture or shutter speed.
- Note: If you are in Manual (M) mode, the EC dial is disabled unless you set the ISO to Auto.
3. Harness the Art of Dynamic Range (DR) Settings for High-Contrast Scenes
We mentioned this earlier, but let’s be specific.
- DR10%: Default. Good for most scenes.
- DR20%: Requires ISO 40 or higher. Expands dynamic range.
- DR40%: Requires ISO 80 or higher. Maximum range.
- The Catch: Don’t rely on this if you can shoot at Base ISO. The sensor’s native range at Base ISO is often superior. Use DR20/40 only when you must shoot at higher ISOs and need to save highlights.
4. Leverage Advanced Filter Modes for Creative In-Camera Effects
Fujifilm cameras have built-in Advanced Filters like Miniature, Toy Camera, Pop Color, and Soft Focus.
- Use Case: Great for quick, fun shots without post-processing.
- Warning: These are destructive to the JPEG. If you shoot RAW, these effects are often not embedded or are harder to replicate. Use them for JPEG shooters who want instant creativity.
5. Master Focus Area and Zone Selection for Sharp Subjects
Stop using “Wide” mode for everything!
- Single Point: Best for static subjects and precision.
- Zone: Select a small cluster of points. Great for sports or moving subjects where you want to track a specific area.
- Wide/Tracking: Let the camera decide. Good for quick snapshots, but can be unpredictable.
- Tip: Assign “Focus Area” to a custom button (like the Fn button) for instant switching.
6. Utilize Focus Lock and Back-Button Focus for Precision
- Focus Lock: Half-press the shutter to focus, then recompose. Simple, but can lead to focus errors if you move the camera too much.
- Back-Button Focus (AF-ON): Separate focusing from the shutter release.
How: Go to Menu > AF/MF > AF Mode > Set AF-ON.
Benefit: You can lock focus on a subject, release the button, and shoot multiple frames without the camera refocusing. Essential for action photography.
7. Optimize ISO Auto Minimum Shutter Speed to Prevent Motion Blur
This is a hidden gem in the ISO Auto settings.
- The Problem: Auto ISO might drop your shutter speed too low, causing blur.
- The Fix: Set ISO Auto with a Minimum Shutter Speed.
- Go to Menu > ISO > ISO Auto > Min. Shutter Speed.
- Set it to “Fast” or “Normal” based on your lens.
Pro Move: Set it to “Slow” for landscapes (tripod) and “Fast” for street.
8. Discover the Hidden Gems of Custom Presets (C1-C7)
Your camera has 7 Custom Presets (C1 to C7).
- Usage: Save your entire setup (ISO, WB, Film Sim, Focus, etc.) to a preset.
- Scenario:
C1: Street (Classic Chrome, Zone AF, ISO Auto).
C2: Portrait (Astia, Single Point, Fixed ISO).
C3: Landscape (Velvia, Tripod, Low ISO). - Switching: Just turn the dial to C1, C2, etc. Instant mode change.
9. Perfect Your White Balance Shifts for That Signature Fuji Look
This is the secret weapon of Fuji photographers.
- The Concept: Shift the White Balance (WB) towards Blue/Amber (B/A) or Green/Magenta (G/M).
- Classic Chrome Trick: Shift slightly towards Green (+2) and Blue (+1) for a cooler, moodier look.
- Portrait Trick: Shift towards Amber (+2) and Magenta (+1) for warmer, skin-friendly tones.
- Note: This only affects JPEGs and the preview in RAW.
10. Navigate the Menu System Like a Pro with My Menu
The Fujifilm menu is deep. Use My Menu to pin your most-used settings.
- How: Go to the menu, find a setting, press the “Q” or “Menu/OK” button to add it to My Menu.
- Result: A personalized top-level menu with just the settings you care about. No more hunting through 5 sub-menus.
1. Use the Electronic Level to Keep Your Horizon Straight
- Feature: The Electronic Level overlay shows if your camera is tilted.
- Activation: Press the DISP/BACK button until the level appears.
- Why: Crucial for landscape and architecture photography. A croked horizon ruins a great shot.
12. Experiment with Grain Effect for Analog Texture
- Settings: Strong/Weak, Large/Small.
- Usage: Add texture to clean digital images.
- Tip: Use “Strong/Small” for a gritty, documentary feel. Use “Weak/Large” for a subtle, film-like grain.
13. Master the Art of Highlight and Shadow Tone Adjustments
- Highlight Tone: Controls the brightness of the brightest parts. -2 is great for saving skies.
- Shadow Tone: Controls the darkness of the shadows. +2 adds contrast; -2 lifts shadows.
- Combination: Try Highlight -2 / Shadow +2 for a flat, high-dynamic-range look that is easy to grade later.
14. Utilize Focus Check and Focus Peaking for Manual Focus Mastery
- Focus Peaking: Highlights edges in red/yellow/green when in focus. Good for quick checks.
- Focus Check: Zooms in 10x on the subject.
- Best Practice: Use Focus Peaking to get close, then Focus Check to verify. Don’t rely on peaking alone for critical sharpness.
15. Leverage the Built-in Flash and External Shoe Mount Options
- Built-in Flash: Pop it up! It’s small but effective for fill flash in portraits.
- External Shoe: Use a hot shoe flash (like the EF-X50) for more power and bounce capability.
- Tip: Set the flash to Slow Sync for night portraits to capture the background and the subject.
🔍 Deep Dive: Understanding X-Trans Sensor Technology and Color Science
Why do Fujifilm photos look different? It’s the X-Trans Sensor.
The Bayer vs. X-Trans Debate
Most cameras use a Bayer pattern (RGB) which repeats every 2×2 pixels. This regularity can cause moiré (fake patterns) in fine details, requiring an optical low-pass filter (OLPF) to blur the image slightly.
Fujifilm’s X-Trans uses a 6×6 pseudo-random pattern.
- No OLPF: Because the pattern is random, moiré is virtually eliminated.
- Result: Higher resolution and sharpness without the softness of an OLPF.
- The Downside: Some older software (like older versions of Lightroom) struggled to demosaic X-Trans files, leading to “wavy” artifacts. Modern software (Lightroom CC, Capture One) handles this perfectly.
The Color Science: Why Fuji Colors Pop
Fujifilm’s color science is rooted in decades of film chemistry.
- Skin Tones: Fujifilm is renowned for natural, flattering skin tones, even in JPEGs.
- Green Rendering: The greens in landscapes are often described as “rich” and “organic,” avoiding the neon look of some competitors.
- Blue Sky: Deep, rich blues that don’t clip easily.
Expert Insight: “The X-Trans sensor is not just a sensor; it’s a color engine. It captures light in a way that mimics the chemical response of film emulsions.” — Camera Brands™ Senior Photographer
🎒 Best Fujifilm Lenses for Every Photography Style and Budget
A great camera needs great glass. Here are our top picks for every genre.
Street Photography
- Top Pick: Fujinon XF 23mmF1.4 R LM WR
Why: The “nifty fifty” equivalent (35mm full-frame). Fast aperture, sharp, and compact.
Alternative: XF 35mmF1.4 R (Classic, slightly slower autofocus but legendary rendering).
Portraits
- Top Pick: Fujinon XF 56mmF1.2 R WR
Why: The ultimate portrait lens. Bokeh is creamy, sharpness is razor-thin.
Budget Option: XF 50mmF2 R WR (Smaller, lighter, still sharp).
Landscapes
- Top Pick: Fujinon XF 10-24mmF4 R OIS WR
Why: Ultra-wide, constant aperture, weather-sealed.
Alternative: XF 16mmF1.4 R WR (For low-light landscapes).
Macro
- Top Pick: Fujinon XF 80mmF2.8 R LM OIS WR Macro
Why: 1:1 magnification, incredible sharpness, weather-sealed.
All-Rounder
- Top Pick: Fujinon XF 18-5mmF2.8-4 R LM OIS
Why: The best kit lens ever made. Sharp, fast, and versatile.
👉 Shop Fujifilm Lenses on:
- Amazon: Fujifilm Lenses Search
- B&H Photo: Fujifilm Lenses
- Fujifilm Official: Fujinon Lenses
📱 Fujifilm XApp and Remote Control: Connecting Your Camera to Your Smartphone
Gone are the days of the clunky “Camera Remote” app. Enter the Fujifilm XApp.
What is XApp?
A modern, robust app that connects your camera to your smartphone via Bluetooth and Wi-Fi.
- Features:
Remote Shooting: Control settings and shoot from your phone.
Image Transfer: Auto-transfer photos to your phone for social media.
Location Data: Tag your photos with GPS data.
Firmware Updates: Update your camera directly from the app.
How to Set It Up
- Download Fujifilm XApp from the App Store or Google Play.
- Turn on Bluetooth on your camera and phone.
- Pair the devices.
- Connect to Wi-Fi for high-speed transfer.
Pro Tip: Use the Auto Transfer feature to instantly back up your photos to your phone as you shoot. It’s a game-changer for social media creators.
🛠️ Customizing Your Fujifilm Camera: Buttons, Dials, and Workflow Hacks
Fujifilm cameras are built for tactile control. Don’t let the retro dials fool you; they are highly customizable.
The “Fn” Button
Assign your most-used function here.
- Suggestions: Focus Area, ISO, White Balance, or Drive Mode.
The “Q” Menu
Customize the 12 slots.
- Must-haves: Film Simulation, Highlight/Shadow Tone, Grain Effect, Focus Mode.
Custom Presets (C1-C7)
As mentioned earlier, save your entire workflow to these dials.
- Workflow:
C1: Street (Classic Chrome, Zone AF, ISO Auto).
C2: Portrait (Astia, Single Point, Fixed ISO).
C3: Video (C-Log, 4K, Manual Focus).
Back-Button Focus
- Why? Separates focusing from the shutter.
- How: Assign AF-ON to a rear button. Use the shutter button only for taking the photo.
🌟 Fujifilm Photography Tips for Specific Genres: Portrait, Landscape, and Street
Street Photography
- Simulation: Classic Chrome or Classic Neg.
- Focus: Zone AF or Single Point.
- Shutter: 1/250s or faster to freeze motion.
- Tip: Use Pre-AF to keep the camera ready.
Portrait Photography
- Simulation: Astia or Provia.
- Focus: Eye Detection (Face/Eye Detection ON).
- Aperture: Wide open (F1.4 or F2) for bokeh.
- Tip: Use Highlight Tone -1 to soften skin highlights.
Landscape Photography
- Simulation: Velvia or Provia.
- Focus: Single Point, focus 1/3 into the scene.
- ISO: Base ISO (160 or 20).
- Tip: Use a tripod and Electronic Shutter to eliminate vibration.
🚫 Common Fujifilm Mistakes and How to Avoid Them
Mistake 1: Ignoring the Base ISO
- The Error: Relying on DR20/40 instead of shooting at Base ISO.
- The Fix: Always check your ISO. If you can shoot at 160/20, do it.
Mistake 2: Overusing Auto White Balance
- The Error: Leting the camera decide WB in mixed lighting.
- The Fix: Use WB Shift to correct color casts manually.
Mistake 3: Not Using Custom Presets
- The Error: Diging through menus for every shot.
- The Fix: Set up C1-C7 for your common scenarios.
Mistake 4: Shooting RAW without Understanding Film Sim
- The Error: Thinking Film Sim doesn’t matter for RAW.
- The Fix: Use Film Sim as a guide for your post-processing. It’s your creative starting point.
Mistake 5: Ignoring the Histogram
- The Error: Trusting the LCD screen in bright sunlight.
- The Fix: Turn on the Histogram and Highlight Alert (blinkies).
🔎 Search the Site for More Camera Gear Reviews
Looking for more in-depth reviews? We’ve got you covered.
📢 Follow Us for Daily Photography Inspiration
Join our community of photographers. Share your shots, get feedback, and stay inspired.
💬 Leave a Reply: Share Your Best Fuji Shot
We want to see what you’ve captured! Drop a comment below with your best Fujifilm photo and the settings you used. Let’s learn from each other.
🏁 Conclusion: Embracing the Fuji Way of Seeing

So, there you have it. From the X-Trans sensor to the Classic Chrome simulation, Fujifilm offers a unique blend of analog soul and digital precision. We started this journey by asking: Why do Fujifilm photos look so good? The answer lies in the intentional design of the camera, the rich color science, and the creative freedom it gives you.
Key Takeaways:
- Master the Q Menu and Custom Presets for speed.
- Respect the Base ISO for maximum dynamic range.
- Experiment with Film Simulations and WB Shift to find your signature look.
- Don’t fear the RAW file, but embrace the JPEG as a creative tool.
Fujifilm isn’t just a camera; it’s a way of seeing. It encourages you to slow down, think about your composition, and embrace the moment. Whether you’re shooting street, portrait, or landscape, the Fuji system is ready to help you capture it all.
Final Thought: The best camera is the one you have with you. But with a Fujifilm, you have a camera that inspires you to use it. So, grab your X-T30, X-Pro3, or X-H2, and go out there. The world is waiting for your unique perspective.
🔗 Recommended Links for Fujifilm Enthusiasts
Cameras & Lenses
- Fujifilm X-T5: Amazon | B&H Photo | Fujifilm Official
- Fujifilm X10VI: Amazon | B&H Photo | Fujifilm Official
- Fujinon XF 23mmF1.4 R LM WR: Amazon | B&H Photo | Fujifilm Official
Books & Resources
- “The Fujifilm X System: A Complete Guide” by Thomas Heaton: Amazon
- “Fujifilm X-Series: The Definitive Guide” by David Busch: Amazon
❓ FAQ: Your Burning Questions About Fujifilm Cameras Answered

How do I use Fujifilm’s Classic Chrome film simulation for street photography?
Classic Chrome is the quintessential street photography simulation. It desaturates colors and adds a slight green/magenta shift, creating a mody, cinematic look.
- Settings: Set Film Simulation to Classic Chrome.
- Tweaks: Try Highlight Tone -1 and Shadow Tone 0 for a balanced look.
- WB Shift: Add a touch of Green (+1) and Blue (+1) for that signature cool tone.
- Why it works: It makes busy streets look less chaotic and more artistic, perfect for capturing the “vibe” of a city.
Read more about “📸 7 Best Fujifilm Mirrorless Cameras for Every Shooter (2026)”
What are the best Fujifilm lens settings for low light photography?
Low light requires a combination of the right lens and camera settings.
- Lens: Use a fast prime lens like the XF 35mmF1.4 or XF 56mmF1.2.
- Aperture: Open up to F1.4 or F2 to let in maximum light.
- ISO: Don’t be afraid to push ISO to 320 or 640. The X-Trans sensor handles noise well.
- Shutter Speed: Use the SAINT method. Set your shutter speed to the minimum safe speed (e.g., 1/60s) and let ISO adjust.
- Stabilization: Enable OIS on your lens and set IBIS to Mode 2 (Shooting Only) for sharper handheld shots.
Read more about “📸 10 Compact Cameras with Advanced Features (2026)”
How can I master Fujifilm’s dynamic range optimizer for better portraits?
The “Dynamic Range” (DR) settings are often misunderstood.
- The Truth: For portraits, DR10% is usually sufficient if you shoot at Base ISO.
- When to use DR20/40: Only use these if you are forced to shoot at higher ISOs (e.g., ISO 80) and need to save highlights in a high-contrast scene.
- Better Approach: Use Highlight Tone -2 in your custom settings to preserve highlights naturally, rather than relying on the digital DR boost.
- Tip: Shoot in RAW + JPEG and adjust the highlights in post-processing for the best results.
Which Fujifilm camera modes are best for capturing fast-moving moments?
For fast action (sports, kids, pets), you need speed and precision.
- Drive Mode: Set to Continuous High (CH).
- Focus Mode: Use Zone AF or Wide/Tracking with Continuous AF (C).
- Shutter Type: Enable Electronic Front-Curtain Shutter (EFCS) to reduce vibration, or use the Mechanical Shutter for absolute reliability.
- ISO: Set ISO Auto with a Minimum Shutter Speed of 1/50s or faster.
- Tip: Use Pre-AF to keep the camera focused and ready to fire.
Read more about “🏆 7 Best Camera Brands for Action Shots (2026)”
📚 Reference Links and Sources
- Fujifilm X Series Fundamentals: Fujifilm Official
- Kristoffer Trole’s Fujifilm Tips: Kristoffer Trole Blog
- X-Trans Sensor Technology: Fujifilm Technical Whitepaper
- Capture One vs. Lightroom for X-Trans: Capture One Blog
- Facebook Community Discussion: Tips for using Fujifilm X-T30 camera? – Facebook
- DPReview Sample Files: DPReview