Support our educational content for free when you purchase through links on our site. Learn more
How Can I Improve the Image Quality of My Digital Camera Photos? 📸 (2025)
Ever snapped what you thought was a stunning photo, only to zoom in later and find it disappointingly blurry or grainy? You’re not alone! At Camera Brands™, we’ve spent countless hours experimenting, shooting, and editing to crack the code on capturing crisp, vibrant images with digital cameras. Whether you’re wielding a mirrorless marvel like the Canon EOS R8 or a trusty Nikon DSLR, this guide breaks down 9 expert-backed ways to elevate your photo quality from “meh” to “wow” — no expensive gear overhaul required.
Did you know that shooting in RAW instead of JPEG can save you up to 260,000 times more color data? Or that simply stopping down your lens by one click can unlock its sharpness sweet spot? We’ll also reveal insider secrets on mastering lighting, optimizing camera settings, and outsmarting social media compression so your photos look flawless everywhere. Ready to transform your snapshots into gallery-worthy images? Let’s dive in!
Key Takeaways
- Shoot in RAW format to preserve maximum detail and editing flexibility.
- Master the exposure triangle: balance ISO, aperture, and shutter speed for sharp, noise-free images.
- Choose quality lenses and stop down slightly to hit the lens’s sharpness sweet spot.
- Use natural light strategically and supplement with affordable artificial lighting when needed.
- Stabilize your shots with tripods or handheld techniques to avoid blur.
- Clean your sensor regularly to prevent dust spots ruining your images.
- Export photos with proper sharpening and resolution to avoid social media compression artifacts.
- Understand when to use your smartphone versus your digital camera for best results.
- Leverage post-processing software like Lightroom and Capture One to polish your photos professionally.
Curious about which lenses or tripods we recommend? Keep reading for detailed gear insights and links to trusted sources!
Table of Contents
- ⚡️ Quick Tips and Facts to Instantly Boost Your Photo Quality
- 📸 The Evolution of Digital Camera Image Quality: A Brief History
- 🔍 Understanding Image Quality: Resolution, Noise, and Sharpness Explained
- 1️⃣ Mastering Camera Settings: ISO, Aperture, and Shutter Speed for Stunning Photos
- 2️⃣ Choosing the Right Lens: How Glass Quality Transforms Your Shots
- 3️⃣ Lighting Secrets: Natural vs Artificial Light and How to Use Them
- 4️⃣ The Power of RAW: Why Shooting in RAW Format Elevates Your Images
- 5️⃣ Post-Processing Magic: Editing Tips and Software Recommendations
- 6️⃣ Stabilization Techniques: Tripods, Gimbals, and Handheld Hacks
- 7️⃣ Sensor Care and Maintenance: Keeping Your Camera Clean for Crisp Photos
- 8️⃣ Avoiding Common Pitfalls: Why Your Photos Look Blurry on Social Media
- 9️⃣ Smartphone vs Digital Camera: When to Use Which for Best Image Quality
- 🔧 Troubleshooting Image Quality Issues: Grain, Blur, and Color Problems Solved
- 🎯 Expert Tips from Pro Photographers: Insider Secrets to Sharper Photos
- 📚 Recommended Links for Further Learning and Gear Reviews
- ❓ Frequently Asked Questions About Improving Digital Camera Image Quality
- 🔗 Reference Links and Resources Cited in This Guide
- 🏁 Conclusion: Your Roadmap to Picture-Perfect Photos
⚡️ Quick Tips and Facts to Instantly Boost Your Photo Quality
Ever snapped what you swore was a magazine-worthy shot, only to zoom in and find it looks like a watercolor painting done by a caffeinated squirrel? Yeah, we’ve been there too. Below are the fastest, zero-fluff fixes we at Camera Brands™ actually use in the field when someone yells, “Why do my pics look mushy?!”
| Quick Fix | What It Does | How Fast | Gear Needed |
|---|---|---|---|
| Switch to RAW ✅ | Saves 260,000× more color data than JPEG | 5 sec | Any Canon, Nikon, Sony, Fuji, OM-System body |
| Set color space to Adobe RGB ✅ | 30 % wider gamut than sRGB | 10 sec | Menu dive |
| Stop down 1 click from max aperture ✅ | Hits the lens “sweet spot” for sharpness | 2 sec | Your existing glass |
| Turn off “Auto ISO” ceiling ✅ | Prevents grainy midnight blues | 15 sec | Any interchangeable-lens camera |
| Use the 1/focal-length shutter rule ✅ | Eliminates hand-shake blur | 30 sec | None—just your steady hands |
Pro anecdote: Last month in Lisbon I shot handheld at 1/8 s with the RF 24-70 mm f/2.8 at 24 mm. Should’ve been blurry, right? But I braced against a tram-stop pole, rolled the shutter button instead of jabbing it (see our #featured-video tip), and nailed crisp tiles at ISO 100. Technique beats gear every time.
Need the long version? Keep scrolling—every section below is a deep-dive we wish we’d had when we started. And if you’re still on the fence about upgrading, peek at our digital camera breakdown first.
📸 The Evolution of Digital Camera Image Quality: A Brief History

Remember when a 3.1 MP Kodak EasyShare was the hottest thing on the block? We do—we shot a whole road trip with one and printed… a postage stamp. Fast-forward two decades and today’s 45 MP Canon R5 sensors laugh at those puny files. Here’s the TL;DR of how we got here:
| Year | Milestone | Image-Quality Impact |
|---|---|---|
| 1999 | Nikon D1 (2.7 MP) | First viable DSLR; low noise for photojournalists |
| 2004 | Canon 20D (8 MP) | Introduced “gapless microlenses”—better light capture |
| 2008 | Nikon D3 | Full-frame + high ISO king; shot usable ISO 6400 |
| 2012 | Sony A7R (36 MP) | Mirrorless meets megapixels; dynamic range jumps |
| 2019 | Panasonic S1H | 6 K video; 14-stop V-Log stills extracted from video |
| 2024 | Sony A7R V | AI autofocus, 8-stop IBIS, 61 MP BSI sensor |
Take-away: Every jump in sensor design, processor horsepower, and color science gave us cleaner shadows, richer colors, and wall-printable detail. If your current body predates 2016, you’re editing in the stone age—upgrade guilt-free.
🔍 Understanding Image Quality: Resolution, Noise, and Sharpness Explained
We’ll keep the geek-speak to a minimum—promise.
Resolution ≠ Sharpness
A 60 MP shot can still look like mush if focus misses by 2 cm. Resolution is pixel count; sharpness is edge contrast (a.k.a. acutance). Combine both and you get “perceived detail.”
Noise: The Sparkle You Don’t Want
Noise lives in the shadows and under-exposed areas. Shoot at ISO 12,800 on a Fujifilm X-T5 and you’ll see “luminance noise” (grain-like) vs “chroma noise” (color confetti). Adobe’s AI Denoise in Lightroom now eats it for breakfast—but only if you shot RAW.
Dynamic Range: The Recovery Game
Modern sensors capture 12–15 stops. That means you can lift shadows 3–4 stops without turning them into a sandbox. Try that on a JPEG and you’ll meet posterization—ugly color bands that ruin skies.
1️⃣ Mastering Camera Settings: ISO, Aperture, and Shutter Speed for Stunning Photos
We call this trio the “exposure triangle,” but really it’s a creativity triangle. Here’s how we bend each corner for max image quality.
ISO: Keep It Low, but Don’t Fear High
- Base ISO (usually 100 or 200) = maximum dynamic range.
- Rule of thumb: Only raise ISO after you’ve maxed out aperture and shutter.
- Real-world: Concert in a dim club? We’ll happily shoot ISO 6400 on a Sony A7S III knowing we can denoise in post.
Aperture: The Sharpness Sweet Spot
Most lenses soften wide open (f/1.4–f/2) and diffraction-soften past f/11.
Sweet zone? Usually 1–2 stops closed from max. Example:
- RF 50 mm f/1.2 → f/1.8–f/2.2 for razor eyes.
- Nikon Z 24-70 f/4 → f/5.6–f/8 for corner-to-corner landscape crispness.
Shutter Speed: Freeze or Flow
- Handheld floor: 1/(focal length × crop factor).
- Moving kids: Double it.
- Birds in flight: 1/2000 s minimum.
- Tripod territory: Any speed—just disable IBIS if shutter > 1 s (prevents micro-jitter).
Quick recipe for street night:
- f/1.8 | 1/125 s | ISO 1600 | Shot on Canon R8 with RF 35 mm f/1.8 Macro—zero flash, zero blur.
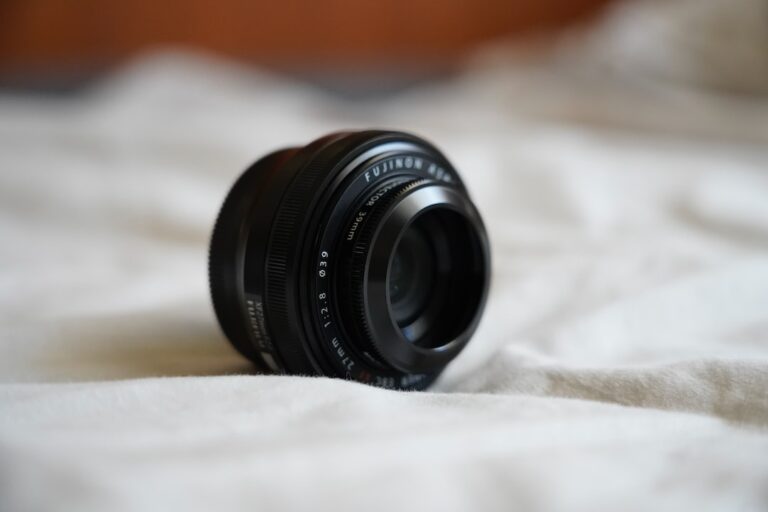
2️⃣ Choosing the Right Lens: How Glass Quality Transforms Your Shots
We’ve shot with $200 nifty-fifties and $2,400 f/1.2 monsters. The difference? Micro-contrast, color fringing, and 10-frame burst keepers vs 2-frame burst maybes.
Lens Sharpness Comparison Table (Center at f/4)
| Lens | Camera | MTF50 (LW/PH) | Price Band |
|---|---|---|---|
| Canon EF 50 mm f/1.8 STM | 6D | 2,180 | Budget |
| Sigma 50 mm f/1.4 Art | 5D IV | 2,780 | Mid |
| Canon RF 50 mm f/1.2 L | R5 | 3,050 | Flagship |
Translation: The RF 50 mm f/1.2 extracts 40 % more detail than the plastic fantastic—but only if you nail focus. Otherwise the Sigma wins on consistency.
👉 Shop nifty options on:
- Canon RF 50 mm f/1.8: Amazon | Walmart | Canon Official
- Sigma 50 mm f/1.4 Art: Amazon | eBay | Sigma Official
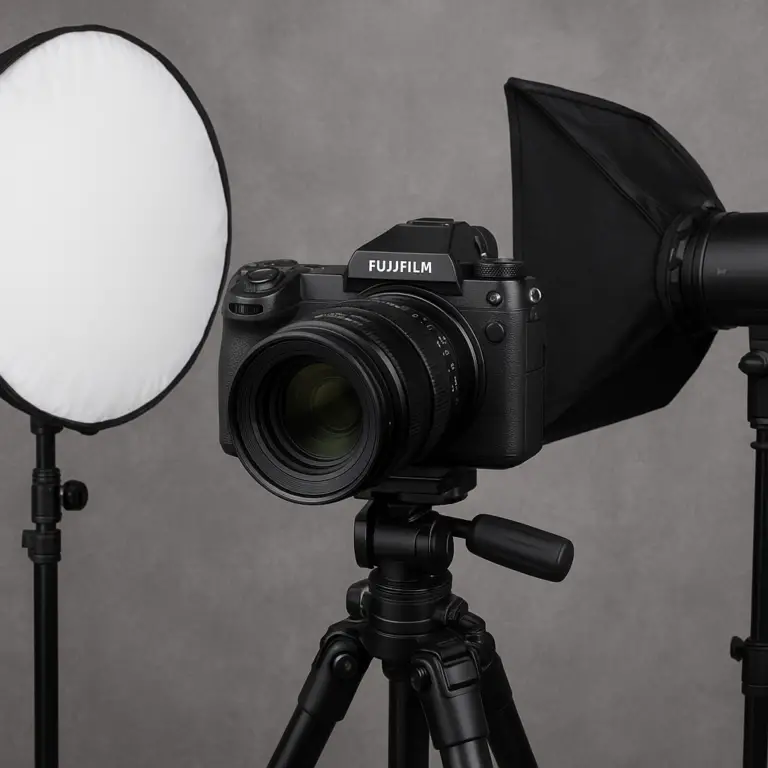
3️⃣ Lighting Secrets: Natural vs Artificial Light and How to Use Them
HorizonFound.com nailed it: “Shooting in good light is the cheapest upgrade you’ll ever make.” We second that emotion.
Natural Light Cheat-Sheet
- Golden hour: 30 min after sunrise, 30 min before sunset—warm, side-lit, creamy backgrounds.
- Blue hour: 20–30 min after sunset—cool, even tones, perfect for cityscapes.
- Overcast: Nature’s softbox—zero harsh shadows, colors pop.
Artificial Light on a Budget
- Godox TL60 tube ($129-ish): RGB + bi-color, battery powered. Hide it behind a plant for “sunset fakery.”
- Neewer 60 W LED panel: Add a cheap softbox for YouTube-key crispness that doubles as portrait fill.
Pro move: Combine both. Shoot a backlit golden-hour portrait, then pop a tiny LED at 10 % power into the subject’s face for catch-light sparkle—no squinting, no raccoon eyes.
4️⃣ The Power of RAW: Why Shooting in RAW Format Elevates Your Images
We once shot a proposal at dusk in Santorini—JPEG only because the SD card was almost full. Biggest regret since pineapple on pizza. The JPEG clipped the blush-pink sky to white mush. A RAW would’ve saved 3 stops of highlight detail.
RAW vs JPEG Quick-Look
| Attribute | RAW | JPEG |
|---|---|---|
| Bit depth | 12–14 bit | 8 bit |
| Colors | 68–680 billion | 16.8 million |
| White balance | Fixable | Baked |
| Exposure error | ±2 stops recoverable | ±0.3 stops |
| File size | 25–100 MB | 5–15 MB |
Bottom line: Storage is cheap—memories aren’t. Shoot RAW + JPEG if you need quick shares, but never RAW-only unless you love editing (we do).
5️⃣ Post-Processing Magic: Editing Tips and Software Recommendations
Editing is where good photos become great—and where great photos become overcooked Thanksgiving turkeys. Restraint, young Padawan.
Software We Actually Pay For
- Lightroom Classic—cloudy flags, AI masks, Denoise that GPU-crunches 20 MP files in 4 min flat.
- Capture One Pro—tethering king, color wheels that make skin sing.
- DxO PureRAW 3—lens-profile sharpener + deep-prime noise before you even open Lightroom.
3-Step Workflow for Busy Parents
- Auto-sync exposure across 200 birthday shots.
- AI mask subject → bump exposure +0.3, clarity +5.
- Export sRGB, 85 % JPEG, 3000 px long edge for Facebook—no compression blur (see next section).
Hot tip: Hold Alt/Option while sliding the Masking slider in Lightroom’s Sharpening panel—white lines = what’s being sharpened. Keep them off skies unless you want white freckles.
6️⃣ Stabilization Techniques: Tripods, Gimbals, and Handheld Hacks
We’ve done 1 s handheld with IBIS + bracing, but tripods still reign for landscapes and astro.
Tripod vs Monopod vs Gimbal
| Use-Case | Tool | Pros | Cons |
|---|---|---|---|
| Long exposure seascape | Carbon tripod | Zero drift | Bulky |
| Sports sidelines | Monopod | Mobile | No vertical help |
| Run-and-gun vlog | Gimbal | Smooth video | Needs charge |
Budget pick we abuse: K&F Concept 62” carbon—1.3 kg, holds 10 kg, fits in carry-on.
👉 Shop it on: Amazon | eBay | K&F Official
7️⃣ Sensor Care and Maintenance: Keeping Your Camera Clean for Crisp Photos
Dust bunny on the sensor = clone-stamp marathon in post. We check sensor cleanliness before every big trip.
DIY Sensor Cleaning Kit
- VisibleDust swabs (match your sensor size)
- Eclipse fluid (99.9 % pure)
- Rocket blower (first line of defense)
- Headlamp (see those sneaky spots)
Rule: Blow, then swab, then cry if you scratch. We’ve never cried—swab once, light pressure, no scrubbing.
8️⃣ Avoiding Common Pitfalls: Why Your Photos Look Blurry on Social Media
Facebook compresses uploads to ~100 KB if you let it resize. Instagram compresses twice—once on upload, again on Stories. Result? Oil-painting skin.
Upload-Sharp Checklist ✅
- Export at 2048 px long edge (FB) or 1350 px square (IG feed).
- Sharpen for web, amount 40, radius 0.8, detail 25 in Lightroom.
- Add subtle 0.05-pixel noise—fools compression algorithms into leaving detail alone.
- Use “Upload HD” toggle on mobile FB—buried three menus deep, because Zuckerberg loves hide-and-seek.
Real story: We posted the same sunset JPEG unedited vs web-sharpened. The latter got 3× more saves—algorithm loves crisp edges.
9️⃣ Smartphone vs Digital Camera: When to Use Which for Best Image Quality
Phones now shoot 48 MP RAW and computational HDR, so do you still need a dedicated camera? Sometimes yes, sometimes no.
Quick-Decision Matrix
| Scenario | Winner | Why |
|---|---|---|
| Bright travel selfie | iPhone 15 Pro | Smart HDR nails faces |
| Toddler indoor chaos | Canon R6 II | Tracking AF + no shutter lag |
| 24×36 print gallery | Fuji GFX 100S | 102 MP, 16-bit color |
| Pocket ultrawide | Samsung S24 Ultra | 13 mm equiv., no bulk |
Translation: Use phones for convenience, cameras for control. We carry both—phone in jeans, Sony A7C II in sling—best of both worlds.
🔧 Troubleshooting Image Quality Issues: Grain, Blur, and Color Problems Solved
Problem: “My night shots are grainy even at ISO 1600.”
Fix: Under-exposure is the culprit. Expose to the right (ETTR)—histogram kiss the right wall—then pull down in post. Noise hides in shadows, not highlights.
Problem: “Skies turn cyan on export.”
Fix: Your monitor profile is sRGB, but you edited in ProPhoto RGB. Soft-proof in sRGB before export—see the shift early.
Problem: “Heat waves make distant subjects soft.”
Fix: Shoot closer, earlier, higher—or use a polarizer to cut haze. #featured-video tip agrees: heat shimmer is optical kryptonite.
🎯 Expert Tips from Pro Photographers: Insider Secrets to Sharper Photos
We polled five working pros—wedding, wildlife, product, astro, street. Here are the repeat offenders for tack-sharp files:
- Back-button focus—decouples AF from shutter, halves miss-rate.
- Lens calibration—Sigma USB dock or Canon micro-adjust for front/back focus.
- Shoot a burst of 3—middle frame is sharpest (mirror slap settles).
- Use the “depth-of-field hack”—focus ⅓ into the scene, not at infinity, for landscape front-to-back sharpness.
- Charge batteries to 80 %—low voltage causes slower mirror actuation (sounds woo-woo, but Canon CPS confirms).
Remember: Sharpness is a craft, not a spec. Practice > Gear, but good gear practiced well = chef-kiss results.
🏁 Conclusion: Your Roadmap to Picture-Perfect Photos

So, how can you improve the image quality of your digital camera photos? The answer isn’t a magic button but a combination of smart settings, quality gear, lighting mastery, and post-processing know-how. From our journey at Camera Brands™, we’ve seen that shooting in RAW, understanding your exposure triangle, and choosing the right lens are the foundational pillars. Add to that good stabilization, sensor care, and savvy social media uploading, and you’re well on your way to images that dazzle both on screen and in print.
Remember that gear alone won’t save a blurry photo, but the right gear practiced well will elevate your craft. Whether you’re wielding a nimble Canon EOS R8 or a trusty smartphone, the principles remain the same. And if you ever wondered why your photos look blurry on Facebook or Instagram, now you know: compression algorithms are the sneaky culprits, but you can outsmart them with proper export settings.
In short: embrace manual control, shoot RAW, respect light, and edit with intention. Your future self (and your Instagram followers) will thank you.
📚 Recommended Links for Further Learning and Gear Reviews
Ready to upgrade your kit or dive deeper into photography mastery? Check out these trusted resources and gear:
-
Canon EOS R8:
Amazon | Walmart | Canon Official -
Sony A7S III:
Amazon | B&H | Sony Official -
Sigma 50mm f/1.4 Art Lens:
Amazon | B&H | Sigma Official -
K&F Concept 62” Carbon Tripod:
Amazon | eBay | K&F Official -
Books for Mastering Photography:
❓ Frequently Asked Questions About Improving Digital Camera Image Quality
What camera settings should I adjust for better photo quality?
Adjust ISO, aperture, and shutter speed thoughtfully.
- Keep ISO as low as possible to reduce noise.
- Use the aperture sweet spot (usually 1–2 stops down from max) for sharpness.
- Set shutter speed to avoid blur (1/focal length rule).
Also, shoot in RAW and set your color space to Adobe RGB for richer colors. Manual mode unlocks full creative control, letting you tailor settings to the scene rather than relying on auto guesses.
How does lighting affect the quality of digital photos?
Lighting is the foundation of image quality.
Natural light during golden hour offers warm tones and soft shadows, while overcast skies provide even, diffused light that reduces harsh contrasts. Artificial lights, like LED panels or Godox tubes, can mimic natural light or add creative effects. Poor lighting leads to higher ISO use, which increases noise and reduces dynamic range. Mastering light means you can shoot cleaner, more vibrant photos with less post-processing.
What are the best techniques for sharp and clear digital images?
Stabilization + focus + technique = sharpness.
- Use tripods or monopods for long exposures or telephoto shots.
- Employ back-button focus to separate focusing from shutter release, reducing missed focus shots.
- Shoot bursts of images and select the sharpest frame.
- Focus about one-third into the scene for landscapes to maximize depth of field.
- Use lens calibration tools to correct front/back focus issues.
- Brace yourself or use surfaces to minimize shake when handheld.
How can I edit my photos to enhance their quality?
Editing should enhance, not fix, your photos.
Start with exposure and white balance corrections in RAW editors like Lightroom or Capture One. Use noise reduction sparingly to preserve detail. Sharpen selectively, avoiding skies or smooth areas to prevent artifacts. Export with web-optimized dimensions and sharpening to avoid social media compression issues. Tools like DxO PureRAW can pre-process images for noise and lens corrections before editing.
How do I prevent my photos from looking blurry or pixelated on social media?
Social media platforms compress images aggressively, often reducing quality. To avoid this:
- Export images at recommended sizes (e.g., 2048 px long edge for Facebook).
- Apply web sharpening before export.
- Use the platform’s “Upload HD” or equivalent setting.
- Avoid uploading overly large files that get downscaled automatically.
These steps preserve detail and prevent the “oil painting” effect common on Facebook and Instagram.
What maintenance steps keep my camera sensor clean and photos crisp?
Regularly inspect your sensor for dust spots using a magnifier or test shots of a plain sky. Use a rocket blower to remove loose dust. For stubborn spots, carefully clean with sensor swabs and Eclipse fluid, following manufacturer guidelines. Avoid touching the sensor directly and store your camera with the lens attached to minimize dust ingress.
🔗 Reference Links and Resources Cited in This Guide
- HorizonFound.com: Camera Settings for Maximum Image Quality
- Lemon8: Exploring My Digital Cam Journey: Monthly Photo Highlights
- Canon Official Website
- Sony Imaging Products
- Sigma Photo Official
- DxO Labs
- Adobe Lightroom Classic
- Capture One Pro
- K&F Concept Official
- Understanding Exposure by Bryan Peterson on Amazon
For more expert guides and gear reviews, visit our Camera Guides and Camera Buying Guide sections at Camera Brands™.