Support our educational content for free when you purchase through links on our site. Learn more
How Do I Connect My Olympus Camera? 5 Easy Ways to Master It in 2025 📸
Ever found yourself staring at your Olympus camera, wondering, “How on earth do I connect this thing to my phone or computer?” You’re not alone! We’ve all been there—ready to share that perfect shot but stuck in a tangle of cables or confusing menus. But what if we told you connecting your Olympus camera could be as effortless as snapping a photo? From wireless magic with the OM Image Share app to trusty USB cables and even HDMI hookups for big-screen viewing, this guide breaks down five foolproof ways to get your camera talking to your devices like a pro.
Stick with us, and you’ll unlock hidden features like remote shooting, geotagging, and lightning-fast transfers. Plus, we’ll share insider tips to troubleshoot those pesky connection hiccups. Ready to turn your Olympus into a connectivity powerhouse? Let’s dive in!
Key Takeaways
- OM Image Share (OI.Share) app is your best friend for wireless photo transfer, remote control, and geotagging.
- USB cables and SD card readers offer reliable, fast wired connections for transferring large files or updating firmware.
- HDMI connections let you showcase your photos and videos on the big screen with ease.
- Bluetooth enhances convenience on newer Olympus models, especially for location tagging and low-power connections.
- Keep firmware updated and use quality cables to avoid common connectivity issues.
👉 Shop Connectivity Essentials:
Table of Contents
- ⚡️ Quick Tips and Facts
- 🕰️ The Olympus Connectivity Journey: From Wires to Wi-Fi
- Why Connect Your Olympus Camera? Unlocking Its Full Potential
- Understanding Your Olympus Camera’s Connectivity Arsenal
- Connecting Your Olympus Camera: Step-by-Step Guides for Every Method
-
- What is OM Image Share (OI.Share) and Why You Need It
- Getting Started: Downloading and Installing OI.Share
- Pairing Your Olympus Camera with Your Smartphone/Tablet (iOS & Android)
- Transferring Photos & Videos Wirelessly: A Breeze!
- Remote Control Shooting: Be Your Own Director!
- Adding Geotags to Your Adventures
- Applying Art Filters & Editing On-the-Go
-
- Troubleshooting Olympus Connectivity: When Things Go Sideways 😩
- Optimizing Your Olympus Camera Connectivity: Pro Tips & Essential Gear ✨
- 🔮 The Evolution of Olympus Connectivity: What’s Next for OM System?
- Conclusion: Your Olympus, Connected and Ready! 🎉
- Recommended Links 📚
- Frequently Asked Questions (FAQ) 🤔
- Reference Links 🔗
Alright, let’s dive into the world of Olympus camera connectivity! 📸 We’re the Camera Brands™ team, and we’re here to make connecting your Olympus camera a breeze. Whether you’re a seasoned pro or just starting out, we’ve got you covered. Get ready to unleash the full potential of your Olympus!
⚡️ Quick Tips and Facts
Before we get into the nitty-gritty, here are some quick tips and facts to keep in mind:
- Wi-Fi is your friend: Most modern Olympus cameras have built-in Wi-Fi. Use it! It’s the easiest way to transfer photos and control your camera remotely.
- OI.Share is essential: Download the Olympus OM Image Share (OI.Share) app. It’s free and unlocks a ton of features. OM System OI.Share
- USB is reliable: When in doubt, a USB cable is your best bet for transferring large files.
- Firmware matters: Keep your camera’s firmware updated. Updates often include connectivity improvements.
- Bluetooth for location: Newer models use Bluetooth for seamless location data tagging.
- SD card reader for speed: An SD card reader is the fastest way to transfer files to your computer.
- HDMI for big screens: Use an HDMI cable to view your photos and videos on your TV.
- Check compatibility: Not all features are available on all models. Check your camera’s manual.
- Private Wi-Fi setting: Some Olympus cameras require that you set the Wi-Fi Connect settings to “Private” under Wi-Fi settings in the camera’s menu in order to browse photos/videos. PhotoSync Pairing Guide
🕰️ The Olympus Connectivity Journey: From Wires to Wi-Fi
Let’s take a quick trip down memory lane. Remember the days of film and darkrooms? 🎞️ Thankfully, we’ve come a long way! Olympus, like other camera brands https://www.camerabrands.org/category/camera-brands/ , has evolved its connectivity options over the years.
In the beginning, it was all about physical connections. USB cables were the primary way to transfer photos from your camera to your computer. Then came Wi-Fi, which revolutionized the way we share and control our cameras. Now, Bluetooth is adding another layer of convenience, especially for geotagging.
This evolution has made it easier than ever to capture moments and share them with the world. And with the rise of smartphones, Olympus has embraced mobile connectivity with apps like OM Image Share (OI.Share).
Why Connect Your Olympus Camera? Unlocking Its Full Potential
Why bother connecting your Olympus camera in the first place? 🤔 Here’s why:
- Instant Sharing: Share your photos and videos on social media in seconds.
- Remote Control: Control your camera from your smartphone, perfect for selfies or group shots.
- Backup and Storage: Easily back up your photos to your computer or cloud storage.
- Geotagging: Add location data to your photos, so you always know where you took them.
- Big Screen Viewing: Show off your photos and videos on your TV.
- Creative Control: Adjust camera settings and apply art filters from your smartphone.
- Firmware Updates: Keep your camera up-to-date with the latest features and improvements.
Connecting your Olympus camera opens up a world of possibilities. It’s like giving your camera superpowers! ✨
Understanding Your Olympus Camera’s Connectivity Arsenal
Before we dive into the how-to, let’s understand the different ways you can connect your Olympus camera:
- Wi-Fi: Wireless connection for transferring photos, remote control, and geotagging.
- USB: Wired connection for transferring photos, charging, and firmware updates.
- HDMI: Wired connection for viewing photos and videos on a TV or monitor.
- SD Card Reader: External device for fast photo and video transfers.
- Bluetooth: Wireless connection for geotagging and low-power communication.
Each method has its pros and cons, so let’s explore them in detail.
Connecting Your Olympus Camera: Step-by-Step Guides for Every Method
Alright, let’s get down to business! Here are detailed, step-by-step guides for connecting your Olympus camera using each method.
1. Seamless Wi-Fi Connection with OM Image Share (OI.Share) App 📱
Wi-Fi is the most versatile way to connect your Olympus camera. With the OM Image Share (OI.Share) app, you can transfer photos, control your camera remotely, and more.
What is OM Image Share (OI.Share) and Why You Need It
OM Image Share (OI.Share) is the official Olympus app for connecting your camera to your smartphone or tablet. It’s like a Swiss Army knife for your camera, offering a range of features:
- Wireless Photo Transfer: Transfer photos and videos to your smartphone or tablet.
- Remote Control: Control your camera’s settings and shutter from your smartphone.
- Geotagging: Add location data to your photos.
- Art Filters: Apply creative filters to your photos.
- Easy Connection: Connect your camera and smartphone by scanning a QR code.
- Camera How To: Tutorial videos on shooting techniques.
According to OM System, the app supports both Bluetooth and Wi-Fi camera connections for importing photos, and offers remote shooting modes with live view and remote shutter capabilities. OM System OI.Share
Getting Started: Downloading and Installing OI.Share
First things first, download and install the OM Image Share (OI.Share) app on your smartphone or tablet.
- iOS: Download from the App Store.
- Android: Download from the Google Play Store.
Once installed, open the app and follow the on-screen instructions to grant the necessary permissions.
Pairing Your Olympus Camera with Your Smartphone/Tablet (iOS & Android)
Now, let’s pair your Olympus camera with your smartphone or tablet. The process is similar for both iOS and Android devices.
- Enable Wi-Fi on Your Camera:
- Go to your camera’s menu.
- Find the Wi-Fi or Wireless Communication option.
- Enable Wi-Fi.
- Display the QR Code:
- Select the OI.Share Connection option.
- Your camera will display a QR code on the LCD screen.
- Scan the QR Code:
- Open the OM Image Share (OI.Share) app on your smartphone or tablet.
- Tap the Connect to Camera button.
- Scan the QR code displayed on your camera’s LCD screen.
- Enter Password (If Required):
- Some cameras may require you to enter a password.
- The password is displayed on your camera’s LCD screen.
- Connection Established:
- Once the connection is established, you’ll see a confirmation message on both your camera and your smartphone/tablet.
According to PhotoSync, the camera will create a Wi-Fi hotspot, and the connection information (Wi-Fi SSID and password) will be displayed. PhotoSync Pairing Guide
Transferring Photos & Videos Wirelessly: A Breeze!
With your camera and smartphone/tablet connected, you can now transfer photos and videos wirelessly.
- Select Photos on Your Camera:
- On your camera, go to the Playback mode.
- Select the photos and videos you want to transfer.
- Choose the Send to Smartphone option.
- Receive Photos on Your Smartphone/Tablet:
- Open the OM Image Share (OI.Share) app.
- The app will automatically detect the incoming photos and videos.
- The transferred files will be saved to your smartphone/tablet’s photo library.
Remote Control Shooting: Be Your Own Director!
The OM Image Share (OI.Share) app also allows you to control your camera remotely. This is perfect for selfies, group shots, or capturing wildlife without disturbing them.
- Select Remote Control Mode:
- In the OM Image Share (OI.Share) app, tap the Remote Control button.
- Adjust Camera Settings:
- You can adjust various camera settings, such as aperture, shutter speed, ISO, and white balance, from your smartphone/tablet.
- Take the Shot:
- Tap the Shutter button to take a photo.
- You can also start and stop video recording remotely.
Adding Geotags to Your Adventures
Geotagging adds location data to your photos, so you always know where you took them.
- Enable Location Services:
- On your smartphone/tablet, enable location services for the OM Image Share (OI.Share) app.
- Enable Geotagging in the App:
- In the OM Image Share (OI.Share) app, go to the Settings menu.
- Enable the Geotagging option.
- Shoot and Geotag:
- As you take photos, the app will automatically add location data to them.
Applying Art Filters & Editing On-the-Go
The OM Image Share (OI.Share) app also offers a range of art filters and editing tools.
- Select a Photo:
- In the OM Image Share (OI.Share) app, select a photo from your smartphone/tablet’s photo library.
- Apply Art Filters:
- Tap the Art Filter button.
- Choose from a variety of filters, such as Pop Art, Soft Focus, and Grainy Film.
- Edit Your Photo:
- Use the editing tools to adjust brightness, contrast, saturation, and more.
- Save and Share:
- Save your edited photo to your smartphone/tablet’s photo library.
- Share it on social media or with your friends and family.
According to OM System, the app offers 31 art filter options with supplemental effects, as well as color creator, highlight and shadow control, and other popular photo editing features. OM System OI.Share
2. Direct Data Transfer via USB Cable: The Wired Wonder 💻
Sometimes, the old-fashioned way is the best way. A USB cable provides a reliable and fast connection for transferring photos and videos.
Choosing the Right USB Cable for Your Olympus Camera
Make sure you have the correct USB cable for your Olympus camera. Most Olympus cameras use a Micro-USB or USB-C cable. Check your camera’s manual to be sure.
Connecting to a PC or Mac: Simple Steps
- Turn Off Your Camera:
- Turn off your Olympus camera before connecting it to your computer.
- Connect the USB Cable:
- Connect one end of the USB cable to your camera.
- Connect the other end to your computer.
- Turn On Your Camera:
- Turn on your Olympus camera.
- Select USB Connection Mode (If Required):
- Some cameras may require you to select a USB connection mode.
- Choose the PC Connection or Storage option.
- Your Camera Appears as a Drive:
- Your computer will recognize your camera as an external drive.
- You can now access your camera’s memory card and transfer photos and videos.
Importing Your Masterpieces: Tips for Smooth Transfer
Here are some tips for a smooth photo and video transfer:
- Create a Folder: Create a new folder on your computer to store your photos and videos.
- Drag and Drop: Drag and drop the files from your camera to the folder on your computer.
- Use Photo Management Software: Use photo management software like Adobe Lightroom or Apple Photos to import and organize your photos.
- Eject Your Camera: Once the transfer is complete, eject your camera from your computer before disconnecting the USB cable.
USB Charging: Powering Up Your Olympus
Many Olympus cameras can also be charged via USB. Simply connect your camera to your computer or a USB power adapter.
3. Big Screen Playback: Connecting Your Olympus to a TV via HDMI 📺
Want to show off your photos and videos on the big screen? An HDMI cable is the way to go.
HDMI Cable Types for Olympus Cameras
Most Olympus cameras use a Mini-HDMI (HDMI Type C) cable. Check your camera’s manual to be sure.
Connecting to Your Television or Monitor
- Turn Off Your Camera and TV:
- Turn off your Olympus camera and your TV before connecting the HDMI cable.
- Connect the HDMI Cable:
- Connect one end of the HDMI cable to your camera.
- Connect the other end to your TV.
- Turn On Your TV and Camera:
- Turn on your TV and your Olympus camera.
- Select the Correct HDMI Input:
- On your TV, select the correct HDMI input.
- Enjoy Your Photos and Videos:
- Your camera’s display will be mirrored on your TV screen.
- You can now view your photos and videos in glorious detail.
Viewing Your Photos and Videos in Glorious Detail
Use your camera’s playback controls to navigate through your photos and videos. You can also adjust the display settings on your TV for the best viewing experience.
4. Lightning-Fast Transfers with an SD Card Reader 🚀
For the fastest photo and video transfers, an SD card reader is the way to go.
Why Use an External SD Card Reader?
- Speed: SD card readers are much faster than transferring files via USB.
- Convenience: You don’t need to connect your camera to your computer.
- Compatibility: SD card readers work with any computer.
Types of SD Card Readers and Compatibility
There are two main types of SD card readers:
- USB SD Card Readers: These readers connect to your computer via USB.
- Built-in SD Card Readers: Some computers have built-in SD card readers.
Make sure your SD card reader is compatible with your SD card type (SD, SDHC, SDXC).
The Quickest Way to Get Your Files Off Your Olympus
- Remove the SD Card from Your Camera:
- Turn off your Olympus camera.
- Open the SD card slot.
- Remove the SD card.
- Insert the SD Card into the Reader:
- Insert the SD card into the SD card reader.
- Connect the Reader to Your Computer:
- Connect the SD card reader to your computer via USB.
- Transfer Your Files:
- Your computer will recognize the SD card as an external drive.
- You can now transfer your photos and videos to your computer.
- Eject the Reader:
- Once the transfer is complete, eject the SD card reader from your computer.
- Remove the SD card from the reader.
- Insert the SD card back into your camera.
5. Bluetooth Brilliance: Advanced Connectivity for Newer Olympus Models 🔗
Newer Olympus models are equipped with Bluetooth for seamless connectivity.
Understanding Bluetooth’s Role in Olympus Connectivity
Bluetooth is used for:
- Geotagging: Adding location data to your photos.
- Low-Power Communication: Maintaining a constant connection between your camera and smartphone without draining the battery.
Pairing Your Olympus Camera via Bluetooth
- Enable Bluetooth on Your Camera:
- Go to your camera’s menu.
- Find the Bluetooth option.
- Enable Bluetooth.
- Pair with Your Smartphone/Tablet:
- Follow the on-screen instructions to pair your camera with your smartphone/tablet.
- Use OM Image Share (OI.Share):
- The OM Image Share (OI.Share) app will automatically connect to your camera via Bluetooth.
Benefits of Bluetooth: Location Data and More
With Bluetooth, you can:
- Automatically add location data to your photos.
- Wake up your camera remotely.
- Transfer photos in the background.
Troubleshooting Olympus Connectivity: When Things Go Sideways 😩
Sometimes, things don’t go as planned. Here are some common connectivity issues and how to fix them.
“My Camera Isn’t Showing Up!”: Common Detection Issues
- Check the USB Cable: Make sure the USB cable is properly connected to both your camera and your computer.
- Try a Different USB Port: Try connecting the USB cable to a different USB port on your computer.
- Restart Your Camera and Computer: Sometimes, a simple restart can fix the issue.
- Update USB Drivers: Make sure your computer has the latest USB drivers installed.
- Check Device Manager (Windows): In Windows, check the Device Manager to see if your camera is recognized.
- Check System Information (Mac): On a Mac, check the System Information to see if your camera is recognized.
“The Connection Keeps Dropping!”: Wi-Fi Stability Tips
- Move Closer to the Router: Make sure your camera and smartphone/tablet are within range of your Wi-Fi router.
- Reduce Interference: Keep your camera and smartphone/tablet away from other electronic devices that may cause interference.
- Restart Your Router: Sometimes, a simple restart can fix the issue.
- Update Router Firmware: Make sure your Wi-Fi router has the latest firmware installed.
- Check Wi-Fi Settings: Make sure your camera and smartphone/tablet are connected to the same Wi-Fi network.
Slow Transfer Speeds: What’s the Hold-Up?
- Use a USB 3.0 Port: If your computer has USB 3.0 ports, use them for faster transfer speeds.
- Use an SD Card Reader: An SD card reader is the fastest way to transfer files.
- Close Other Applications: Close other applications on your computer to free up resources.
- Defragment Your SD Card: Defragmenting your SD card can improve transfer speeds.
Firmware Updates: The Unsung Hero of Connectivity
- Check for Updates: Regularly check for firmware updates for your camera.
- Install Updates: Install the latest firmware updates to improve connectivity and fix bugs.
- Follow Instructions: Follow the instructions in your camera’s manual to install firmware updates.
Optimizing Your Olympus Camera Connectivity: Pro Tips & Essential Gear ✨
Want to take your Olympus camera connectivity to the next level? Here are some pro tips and essential gear.
Best Practices for Seamless Connections
- Keep Your Camera Clean: Keep your camera’s ports and connectors clean.
- Use High-Quality Cables: Use high-quality USB and HDMI cables.
- Store Your Camera Properly: Store your camera in a dry and safe place.
- Read the Manual: Read your camera’s manual to learn about all of its connectivity features.
- Practice Makes Perfect: Practice connecting your camera using different methods.
Recommended Accessories for Enhanced Connectivity
- High-Speed SD Card: A high-speed SD card will improve transfer speeds and video recording performance.
- USB 3.0 SD Card Reader: A USB 3.0 SD card reader will provide the fastest photo and video transfers.
- Mini-HDMI Cable: A Mini-HDMI cable will allow you to view your photos and videos on your TV.
- USB Power Adapter: A USB power adapter will allow you to charge your camera via USB.
- External Battery Pack: An external battery pack will extend your camera’s battery life.
🔮 The Evolution of Olympus Connectivity: What’s Next for OM System?
What does the future hold for Olympus camera connectivity? 🤔
With the acquisition of Olympus’s imaging division by OM Digital Solutions, we can expect to see continued innovation in connectivity. We anticipate:
- Improved Wi-Fi and Bluetooth Performance: Faster and more reliable wireless connections.
- Enhanced Mobile Apps: More features and better integration with smartphones and tablets.
- Cloud Integration: Seamless integration with cloud storage services.
- AI-Powered Connectivity: AI-powered features that automatically transfer and organize your photos.
The future of Olympus camera connectivity is bright! ✨
Conclusion: Your Olympus, Connected and Ready! 🎉
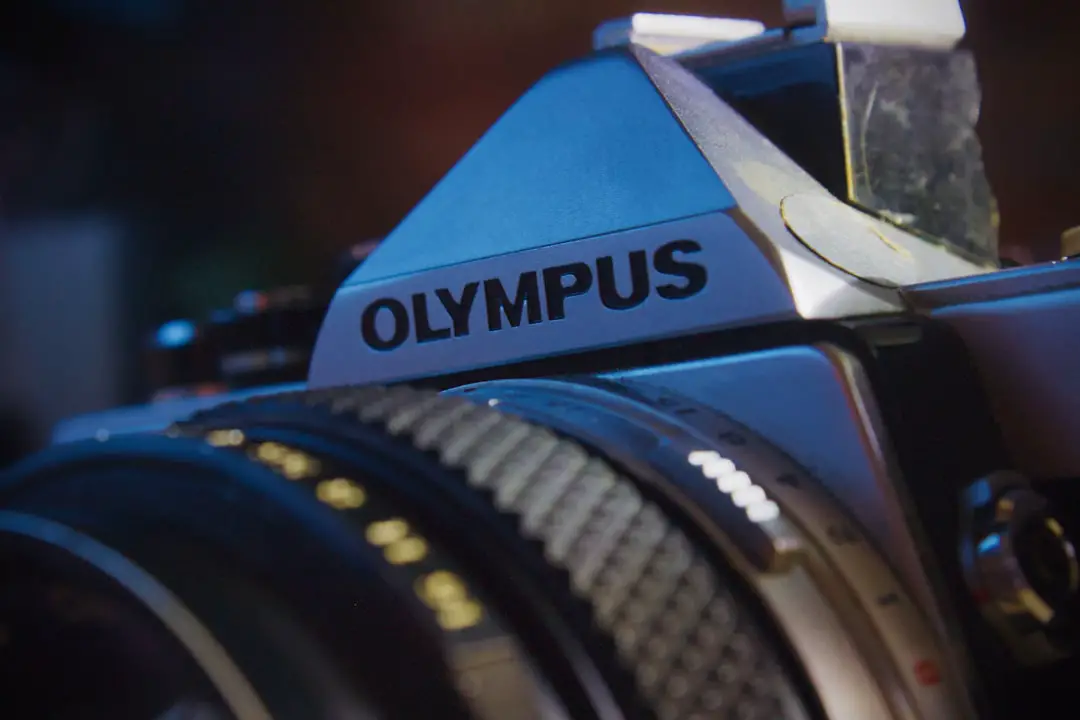
Connecting your Olympus camera unlocks a treasure trove of creative possibilities, from instant photo transfers and remote shooting to geotagging and big-screen viewing. Whether you prefer the wireless freedom of Wi-Fi and Bluetooth via the powerful OM Image Share (OI.Share) app, the reliable speed of USB cables, or the lightning-fast transfers with an SD card reader, Olympus has thoughtfully equipped its cameras to keep up with your photography lifestyle.
Positives:
- OI.Share app offers a seamless, feature-rich wireless experience including remote control, editing, and geotagging.
- Multiple connectivity options (Wi-Fi, Bluetooth, USB, HDMI, SD card) suit every scenario and user preference.
- Firmware updates keep your camera’s connectivity sharp and reliable.
- HDMI output lets you showcase your work on the big screen with ease.
Negatives:
- Some models require fiddling with Wi-Fi settings (like “Private” mode) to browse photos smoothly.
- Wireless transfers can occasionally be slower or drop out, especially in crowded Wi-Fi environments.
- Bluetooth features are limited to newer models.
- The OI.Share app’s functionality varies depending on camera and smartphone compatibility.
Our confident recommendation? Embrace the OM Image Share app as your connectivity hub — it’s a game-changer for Olympus users. Pair it with a high-quality USB cable and a USB 3.0 SD card reader for the ultimate connectivity toolkit. Keep your firmware updated, and you’ll rarely hit a snag.
So, next time you’re out capturing moments, remember: your Olympus camera isn’t just a tool — it’s a connected powerhouse ready to share your story with the world. Now go forth and connect like a pro! 🚀
Recommended Links 📚
👉 CHECK PRICE on:
- Olympus OM-D E-M1 Mark III Camera: Amazon | B&H Photo | Olympus Official Website
- OM Image Share (OI.Share) App: iOS App Store | Google Play Store
- USB-C and Micro-USB Cables: Amazon USB-C Cables | Amazon Micro-USB Cables
- Mini-HDMI Cable for Olympus Cameras: Amazon Mini-HDMI Cables
- USB 3.0 SD Card Reader: Amazon SD Card Readers
- Books on Olympus Photography:
Frequently Asked Questions (FAQ) 🤔
What are the steps to connect my Olympus camera to my computer via USB?
To connect your Olympus camera to your computer via USB:
- Turn off your camera.
- Use the appropriate USB cable (Micro-USB or USB-C depending on your model).
- Connect the cable from your camera to your computer’s USB port.
- Turn on your camera.
- If prompted, select the USB connection mode (usually “PC Connection” or “Storage”).
- Your computer should recognize the camera as an external drive, allowing you to transfer files.
This method is reliable and fast, especially for large files or firmware updates. Always safely eject your camera before unplugging to avoid data corruption.
How do I connect my Olympus camera to my smartphone for wireless transfer of photos?
Wireless transfer is best done using the OM Image Share (OI.Share) app:
- Download and install OI.Share on your iOS or Android device.
- Enable Wi-Fi on your Olympus camera via the menu.
- Select the OI.Share connection option, which displays a QR code on your camera screen.
- Open OI.Share on your smartphone and scan the QR code.
- Enter the password if prompted.
- Once connected, you can browse, transfer photos, and even control the camera remotely.
This wireless method is convenient and feature-packed, but keep in mind that transfer speeds depend on your Wi-Fi environment.
What type of cable do I need to connect my Olympus camera to my TV for viewing photos?
Most Olympus cameras use a Mini-HDMI (Type C) cable for video output:
- Check your camera’s port to confirm it’s Mini-HDMI.
- Connect the Mini-HDMI end to your camera and the standard HDMI end to your TV.
- Switch your TV to the correct HDMI input.
- Turn on your camera to view photos and videos on the big screen.
This setup is perfect for sharing your work with friends and family in stunning detail.
Can I connect my Olympus camera to my Wi-Fi network to enable remote shooting and image transfer?
Yes! Many Olympus cameras support connecting to your home or mobile Wi-Fi network:
- In your camera’s Wi-Fi settings, choose the option to connect to an existing Wi-Fi network.
- Enter the network credentials.
- Once connected, you can use apps like OI.Share or third-party apps such as PhotoSync to transfer images or remotely control your camera.
Connecting to a Wi-Fi network (instead of direct camera hotspot mode) allows for immediate transfer to remote locations like NAS or cloud storage, enhancing your workflow. PhotoSync Guide
How do I troubleshoot if my Olympus camera’s Wi-Fi connection keeps dropping?
Wi-Fi dropouts can be frustrating. Try these fixes:
- Move closer to your Wi-Fi router or camera hotspot.
- Reduce interference by turning off other wireless devices nearby.
- Restart your camera, smartphone, and router.
- Update your camera’s firmware and smartphone app to the latest versions.
- Set your camera’s Wi-Fi mode to “Private” if available.
These steps usually restore a stable connection.
Can I use Bluetooth to connect my Olympus camera to my smartphone?
Yes, newer Olympus models support Bluetooth for low-power connections:
- Bluetooth is primarily used for geotagging and maintaining a constant connection without draining battery.
- Pair your camera and smartphone via Bluetooth in the camera’s menu and the OI.Share app.
- Bluetooth can also wake up your camera remotely and enable background photo transfers.
Bluetooth complements Wi-Fi by adding convenience and efficiency.
Reference Links 🔗
- Olympus Official Website
- OM Digital Solutions – OM Image Share (OI.Share)
- PhotoSync Olympus Camera Support
- CreativeLive – John Greengo Photography Courses
- Olympus OM-D E-M1 Mark III Product Page
- Amazon – Olympus Cameras
Ready to connect your Olympus and capture the world like never before? Dive into the OM Image Share app and start exploring today! 📸✨
